Using git
What is git?
git is a distributed revision control system, which allows multiple people to collaborate on the same source code independently. git is not something we designed, but most of the most widely used tools in the field of Computer Science — both in industry, research, and academia.
Since we will both be working on building the CS 205 Workbook together, we'll be using git to manage the CS 205 Workbook code!
Setting Up the CS 205 Workbook
Graphicly, we represent git repositories by a cylinder,
 .
Each is
a place that stores code that can be modified via git.
.
Each is
a place that stores code that can be modified via git.
The main CS 205 git repository is at https://gitlab-beta.engr.illinois.edu/cs205dev/workbook. This is both a web site and a git server, so we will work with it both via a web browser and command line git. Graphically, our setup looks like:
Creating your fork of CS 205
It would not be good if we all tried to put all our code in the same place, so the first thing we need to do is create a space that is all yours! You can create a copy of our space by doing a fork:
- Visit https://gitlab-beta.engr.illinois.edu/cs205dev/workbook and click Fork.
- Click any necessary steps to create the fork. (This may be none or several, depending on your gitlab setup.)
-
Click HTTPS and copy the URL of your git repository. We will call this URL
your git fork
and we'll need it for the next step.

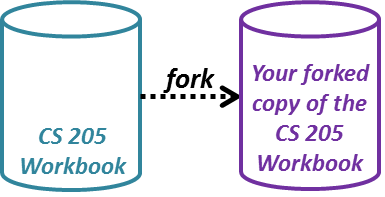
After completing the fork, we now have two git repositories: the course-wide CS 205 repository and your personal fork of the repository. Graphically, your setup is now:
Creating a clone of your fork on your hard drive
Up until now, everything we have done is in the cloud. We now need to get the files from the cloud to your hard drive:
- Open up a command prompt on your computer
- Navigate to your CS 205 directory
-
Run
git clone your git fork, replacing the end of the command with the URL from the previous step. -
If the command was successful, you will see a bunch of text:
Cloning into 'workbook'...
remote: Counting objects: 120, done.
remote: Compressing objects: 100% (107/107), done.
remote: Total 120 (delta 31), reused 0 (delta 0)Receiving objects:  61% (74/120)
, 892.00 KiB | 1.36 MiB/s
Receiving objects: 100% (120/120), 6.82 MiB | 1.36 MiB/s, done.
Resolving deltas: 100% (31/31), done.
Checking connectivity... done.
-
You now have the CS 205 Workbook! Run
cd workbookto navigate into your workbook directory.
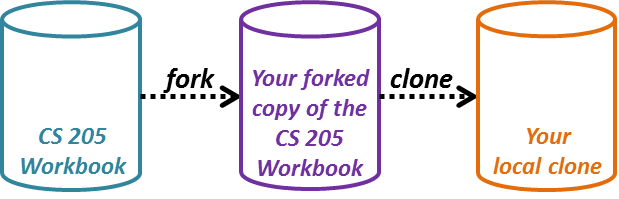
Graphically, we now have a total of three git repositories:
Adding a pointer from your local repository to our repository
Thinking of your local repository as your main working spot, git connects you with the other repositories via remotes. By default, the remote you clone from is called the origin, as it is the origin of the files you just downloaded to your computer. This is already set up for you!
Lets set up one more remote -- a connection to the main CS 205 workbook. This main workbook is where we will release new demos, labs, and MPs. Since we use that as the location we release content, we will add this as a remote that is called release:
-
In your CS 205 workbook directory, run
git remote add release https://gitlab-beta.engr.illinois.edu/cs205dev/workbook.git - If the command was successful, the command generates no text and you should get a prompt back.
-
To double-check it worked, run
git remote -vto list the remotes you have set up. You should see four lines of output:
origin  your git fork (fetch)
origin  your git fork (push)
release https://gitlab-beta.engr.illinois.edu/cs205dev/workbook (fetch)
release https://gitlab-beta.engr.illinois.edu/cs205dev/workbook (push)
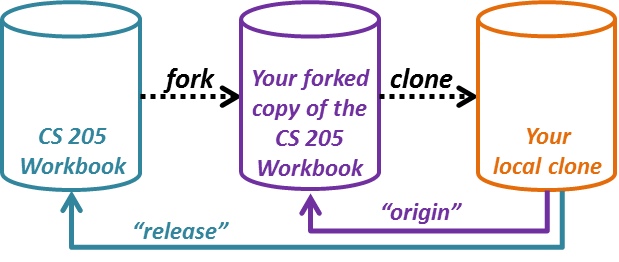
Graphically, we now have several pointers to our remotes:
Fetching content for the CS 205 Workbook
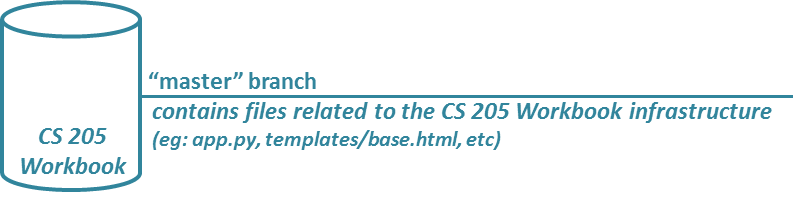
Right now, you have an empty CS 205 Workbook. This means that you have the infrastructure of the workbook but no demos, labs, or MPs. All of the files related to the infrastructure live on the master branch, the default branch that exists in all git repositories. Graphically, we can see the master branch as part of our repository:
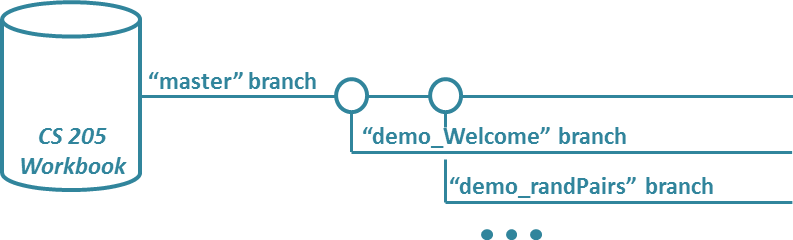
In CS 205, each exercise (eg: demo, lab, or MP) is a branch of the release repository. Throughout the semester, we will add more and more branches as we do demos, labs, and MPs. Since all branches require a parent branch, each content branch is a branch off of the master branch, as shown:
Adding the demo_Welcome exercise to the CS 205 Workbook
In order to add an exercise to the local workbook on disk, we need to get the all of the branches from release and then merge them into our local master branch. To do that:
-
Inside of the CS 205 Workbook directory, run
git fetch releaseto get a local copy of all of the exercises. -
Run
git merge release/demo_Welcome masterto merge the demo_Welcome exercise from release into your local master branch.
If successful, you can run/restart your workbook and see that there is now a demo listed under the "Demos" menu at the top-right of the screen:
