

Corresponding TA: Teck Yian Lim
This tutorial is meant to be a guide for you to run your models on Google Cloud Platform’s Machine Learning engine. If you have written your code in a clean way, all you’ll have to do is to copy your training data over onto Google’s server, provide a config file and you should be able to run your code on Google’s servers without problems.
gcloud ml-engine jobs submit ..., passing in GCS paths
with gs://... instead of local pathsscripts - Python scripts to help prepare data into tfrecordsmodel - Example structure for writing code to train on ml-engineconfig - Example config files for different server choicesREADME.md - This fileconfigTraining the model: (replace local paths with gs://<your-bucket> paths)
gcloud ml-engine jobs submit training <job-name> \
--package-path=<your-code-folder> \
--module-name=<your-code-folder>.<your-training-code> \
--staging-bucket=gs://<your-bucket> --region=us-central1 \
--job-dir gs://<your-bucket>/<job-name> \
--runtime-version 1.2 \
--region us-central1 \
--config=<your-config> \
-- <args-for-your-code>
Visualizing with Tensorboard works simply by replacing the local
file path with the gs://... path.
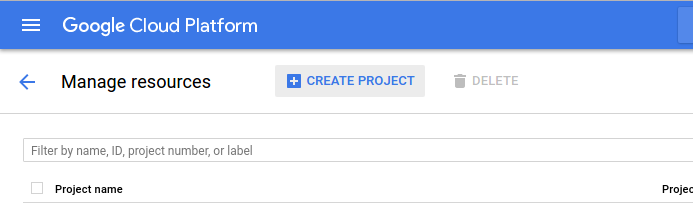
Create a Cloud Platform project on the
Projects Page
IMPORTANT - Do not store important things on Cloud Shell! They can get deleted!
The gcloud command line tool, allows you to interact with Google’s compute
resources from the command line. In this tutorial, we will use this command
line tool to copy data onto the Google Cloud Storage server and to start the
trainng job on the compute servers. We will be using Google Cloud Shell for
this tutorial, you can also install the tool locally if you choose to do so.
It is important to note that the job does not actually run on the terminal that you started the job from, instead a request is sent to Google’s compute resources and the job is executed there. Closing your terminal, turning off your computer, etc does not affect the running of your job.
This terminal and it’s VM instance that’s started for you is temporary, and will cease to exist shortly after closing the browser tab. However, you do not have to worry as this is not the storage that your code will use.
Note: At the time of writing, GPUs are only available in the following regions:
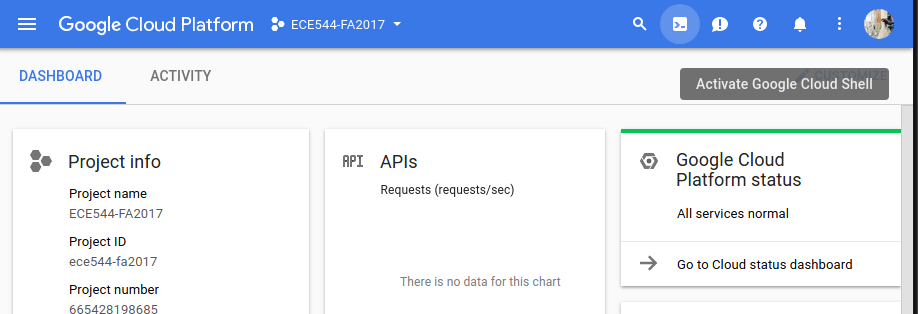
Start Google Cloud shell for your project by clicking on the >_ icon in the
top right hand corner of the console. You should see a prompt that looks like
<username>@<project-name>. Once you see this, you can proceed to the next
step.
In this guide, we will be training a digits classifier with the MNIST data set.
Google Cloud storage locations are called Buckets. In order to store your training data, training output, checkpoints and logs, you will need to create a Bucket. This is the storage that your code will use. The code running on Google’s servers will NOT be able read or write to any of the files on your local hard drive, or the terminal that the job was started from.
gsutil mb -c regional -l us-central1 gs://ece544-example
This will create a bucket named ece544-example and it will automatically be
associated with the active configuration.
You should see it appear in your Cloud Console’s Resources section.
script/create_records./tmp/data/gsutil cp /tmp/data/train.tfrecords gs://ece544-example/data/
gsutil cp /tmp/data/test.tfrecords gs://ece544-example/data/
gsutil ls gs://ece544-example
as per the ls command on LinuxThe compute server choice is stored in a YAML file. Several examples are
provided in the config directory. Feel free to try them out in the next step.
For GPU enabled servers, set scaleTier to CUSTOM. master-type allows you
to choose the number of GPUs available, standard-gpu gives you a single GPU
and complex_model_m_gpu gives you 4 GPUs. It’s also possible to start
a distributed version with multiple servers and GPUs.
For more details, check out Google’s documentation. These options might change as Google add more compute capability to their platform.
Notice that in the example code provided in model, we used no hard coded
paths and accepts all input and output paths as parameters. This will allow us
to either run the model locally or on the cloud without any code changes.
This is a typical use of the command to run the model on the cloud
gcloud ml-engine jobs submit training <job-name> \
--package-path=<your-code-folder> \
--module-name=<your-code-folder>.<your-training-code> \
--staging-bucket=gs://<your-bucket> --region=us-central1 \
--job-dir gs://<your-bucket>/<job-name> \
--runtime-version 1.2 \
--region us-central1 \
--config=<your-config> \
-- <args-for-your-code>
All your code should lie within <package-path> and that it has to be
importable as a module. (i.e. have a __init__.py file, which may be empty)
The module-name parameter is the actual script that you would run should you
run the code locally.
The runtime-version parameter lets you choose the version of Tensorflow and
accompanying libraries to use. At the time of writing, 1.0 and 1.2 are
available. Refer to the
documentation
for further details.
Concretely, to run our example code,
JOB_NAME="ece544_example_run1"
gcloud ml-engine jobs submit training ${JOB_NAME} \
    --package-path model \
    --module-name model.task \
    --staging-bucket gs://ece544-example \
    --job-dir gs://ece544-example/${JOB_NAME} \
    --runtime-version 1.2 \
    --region us-central1 \
    --config config/cloudml-cpu.yaml \
    -- \
    --data_dir gs://ece544-example/data \
    --output_dir gs://ece544-example/${JOB_NAME} \
    --train_steps 10000
After running this, you should see the following output:
Job [ece544_example_run1] submitted successfully.
Your job is still active. You may view the status of your job with the command

  $ gcloud ml-engine jobs describe ece544_example_run1

or continue streaming the logs with the command

  $ gcloud ml-engine jobs stream-logs ece544_example_run1
jobId: ece544_example_run1
state: QUEUED
Note: It might be good for you to name your jobs either with date and time or some labels reflecting your hyperpameter choice, git revision number, etc..
The job will not start immediately, but is instead queued onto the servers.
It usually does not take too long for these jobs to begin, but this depends on
the load on the servers. The ML Engine
page will allow you to see
your code running status apart from the commands suggested in the gcloud
output previously.
Note: If you are trying to use GPUs, it seems the us-central1 has fewer GPUs
and you might see an error saying that there is insufficient scaleTier
resources. If so, try doing things in us-east1 instead.
Once your job has began, you should be able to look at the output and and
visualize the training using tensorboard as though running locally. Simply
replace the local path with the output path you have specified in the previous
command.
tensorboard --port 8080 --logdir gs://ece544-example/ece544_example_run1
Local specific issues: If you have built your own version of tensorflow, you might run into problems if you did not compile with CloudML option during configuration.
Cloud Shell Specific Notes:
Instead of navigating to http://localhost:8080 in your browser, select
Preview on port 8080 from the Web preview menu in the top-left corner of the
Cloud Shell toolbar. This will open a new browser window with tensorboard.
Pros:
Cons:
To start Cloud Shell, click on the >_ icon in the top right of the navigation
bar. If you are on a mobile phone, or have a really narrow browser window, it
might be collapsed into a menu at the top right. Everything works as on
a typical Linux shell environment. Download/clone and clone your code and data
into the cloud shell VM and you will be good to go.
Note: You should see the prompt as <username>@<project-name>. If that’s not
the case, close the shell and start it again. This might happen if the API
access has not been fully enabled.
Pros:
Cons:
To use the gcloud tool, for running your code, and gsutil tool for managing
and copying data, you will need to install the Cloud
SDK on your machine.
gcloud init to start configuration.us-central
zones as default. (This does not really matter but choosing the closest
server reduces latency. Same goes for choosing compute and storage buckets
in the next few steps.)gcloud info to check if everything is in place. You should see
something like this as part of the output: ...
Current Properties:
[core]
project: [ece544-fa2017]
account: [redacted@foo.bar.com]
disable_usage_reporting: [True]
[compute]
region: [us-central1]
zone: [us-central1-a]
...