Group members: Maddie Wilson, Mingle Xiao, and Pranav Perepa
Description: Our goal for this project is to design a way to remotely turn on and off a light switch. The switch will be attached to a motor that the user can control from anywhere in the room. If time permits, we will also add light sensors or a way to control the motor through the user's phone.
Week 1 (Feb 8 - Feb 14)
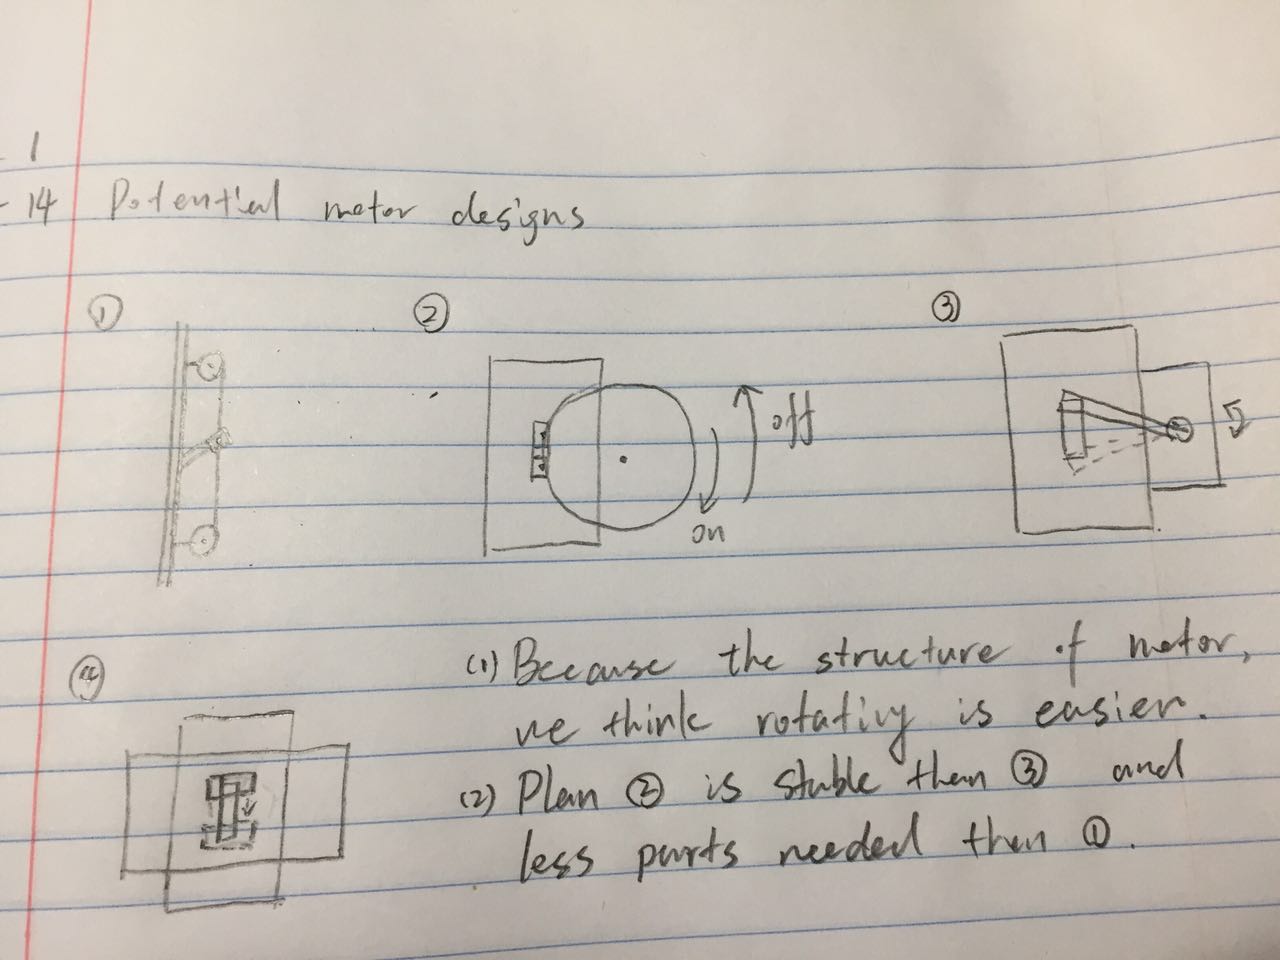
Created start to Wiki page and discussed potential motor designs.
Week 2 (Feb 15 - Feb 21) Finished High-Level Design of Remote controlled light switch.
This week we designed the high-level schematic for our project. Connecting a remote to the arduino with Bluetooth seems to be the best option for the user control. There are multiple Bluetooth shields but Bluno looks like it might be the best option. We can also 3D print the dial that will flip the light switch to guarantee the proper dimensions (when connecting the dial to the motor).
High-Level Design of Remote controlled light switch:
Week 3 (Feb 22 - Feb 28) This week we researched the parts we will use in our project.
This week we researched the parts we will use in our project. The Bluno board seems to be the best choice because it combines an Arduino Uno and bluetooth shield necessary for the remote control. We were also able to find the majority of our smaller supplies in the Estore.
Week 4 (Feb 29 - Mar 6) This week we tested the servo motor. We also decided to go with the Blend Micro board instead of Bluno since the associated app is more iOS-friendly.
This week we tested the servo motor. We were able to use the Arduino software and program the servo through the Arduino Redboard to rotate at different speeds, directions, and for different durations. The servo motor seems like a good choice for our project but it may need to be stronger depending on what we make the dial out of and how resistant the light switch is. We also decided to go with the Blend Micro board instead of Bluno since the associated app is more iOS-friendly.
Week 5 (Mar 7 - Mar 13) This week we tested out the servo using our ECE 110 kit's Arduino RedBoard again.
This week we tested out the servo using our ECE 110 kit's Arduino Redboard again. We were able to change the example code in Arduino to make the servo turn only 90 degrees rather than go through a whole long series of commands. Next week we hope to have the Arduino Blend Micro so we can start to control the servo wirelessly with our phones rather than the computer.
Week 6 (Mar 14 - Mar 20) This week we experimented with the strength of our ECE110 servo.
This week we experimented with the strength of our ECE110 servo. We discovered that the servo has a torque of 16.8 oz*in. The light switch requires 4 N of force to flip off so our radius would have to be very small with this motor. Instead, we are going to check out the ECE shop for a stronger servo to use. We also hope our Blend Micro will come in next week so we can work on the wireless control.
Week 7 (Mar 28 - April 3)
This week we went to the ECE Shop to check on the status of our Blend Micro. The board has not yet arrived so we are going to wait a week and if it is still not in, we found the same board on Amazon. We also found a stronger servo in the ECE Shop which we will be able to use to turn the switch on and off.
Week 8 (April 4 - April 10)
Our Blend Micro board came in! We were able to set it up on the breadboard and download code to it using a Codebender program. We also got the appropriate sized servo motor and once we figure out the code for the Blend Micro we will be able to connect the two.
Week 9 (April 11 - April 17)
We went to the ECE Machine Shop to talk through a construction for our design. We're going to get two switches by next week to test with. We also downloaded the code for the app to connect to the Blend Micro and were able to get the servo to turn. By next week we hope to be able to modify the app to turn our servo as desired to flip the switches on and off.
Week 10 (April 18 - April 24)
This week we got the servo working with the app through the Blend Micro. Using a scroll bar, we are able to turn the servo left and right which will flip the switch(es) on and off. We also plan to meet with the machine shop this week to design the board everything will attach to. We also plan on refining the code if time allows.
Week 11 (April 25 - May 1)
This week we created a mechanism for which the servo could turn both the switches. We did this by going into the CU Fab Lab over the weekend and using the Laser Cutter to make a casing for both the switches and the servo. The servo moved around while turning, causing the angle of rotation to change but we were able to fix this by filling in the case with duct tape. We also changed the code and tested what would happen if the servo rotated for larger or smaller angles. We are getting close to completing the project.

