Team member:
Kaichen Le
Ruhao Xia
Introduction:
Because the light varies from time to time, it is annoying for the drivers to adjust the vehicle-mounted sun shield frequently. In order to solve this problem, we want to design a photoreceptive sun shield that can adjust automatically. It can effciently control the amount of light that shines into the car.
02/15/16
High level block diagram:
02/22/16
Material we need:
Light sensor: mini photocell (light R:1k ohms ; dark R:10k ohms)
Control board: red board
Motor: servo motor, resistors, flex sensor
Power source: PC
02/29/16
We decided to use Servo motor because servo motor has better control of the position.(Although it cannot control speed, it is okay since we do not need to control the speed of the shield.)
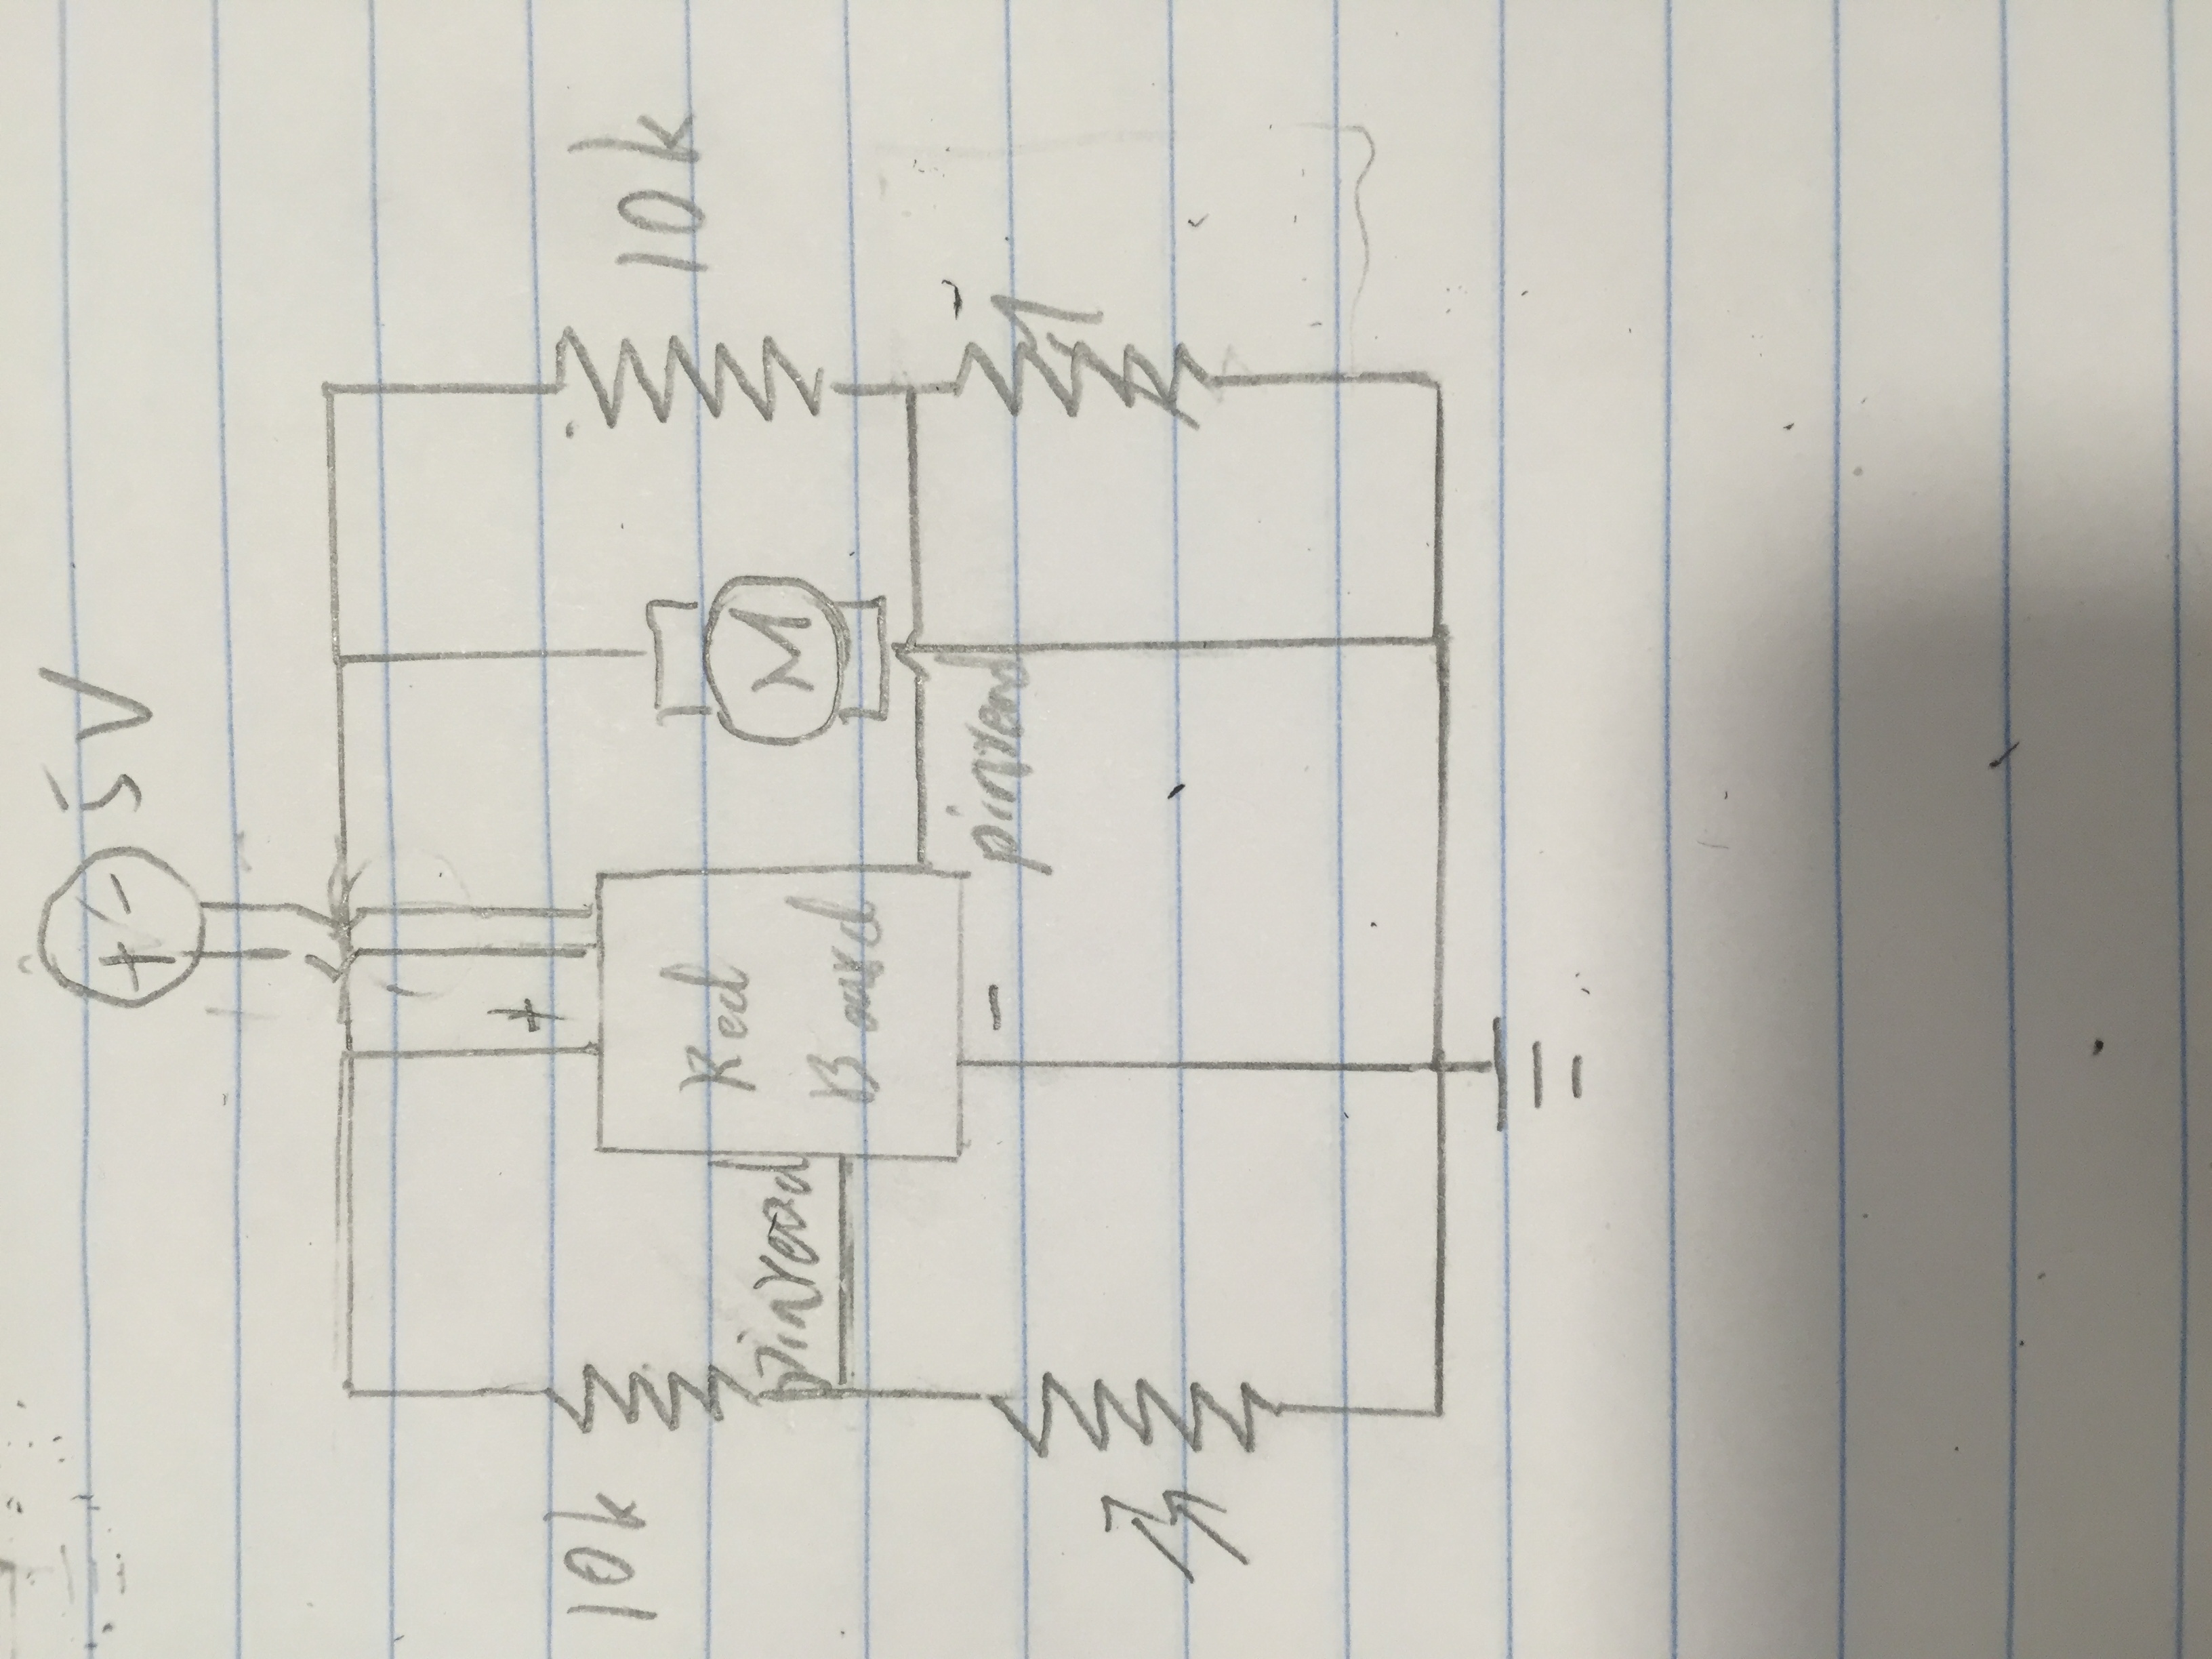
Circuit schematic(basic):
We tried to build a circuit in which current change as the light change with mini photocell.
03/07/16
We tried to connect the motor into the circuit we built last time We let it turn in a certain speed as the light change.
03/14/16
We finished the model last time. So we decide to spend the rest of this semester working on making an advanced machine that is strong enough to turn the real sun shield.
We try to use transistor and inverter into the circuit.
It seems that we do not need a transistor in the circuit because the we can use arduino to control servo motor directly, professor said that we will need to use transistor when we want to use low power signal to provide a high power signal, which is not the case of servo motor.
03/28/16
We decided to make our own curtains. We decided to change the previous servo motor to generic high torque continuous rotation servo. We also need to use hall effect sensor to control the position of the servo or the curtain.
04/04/16
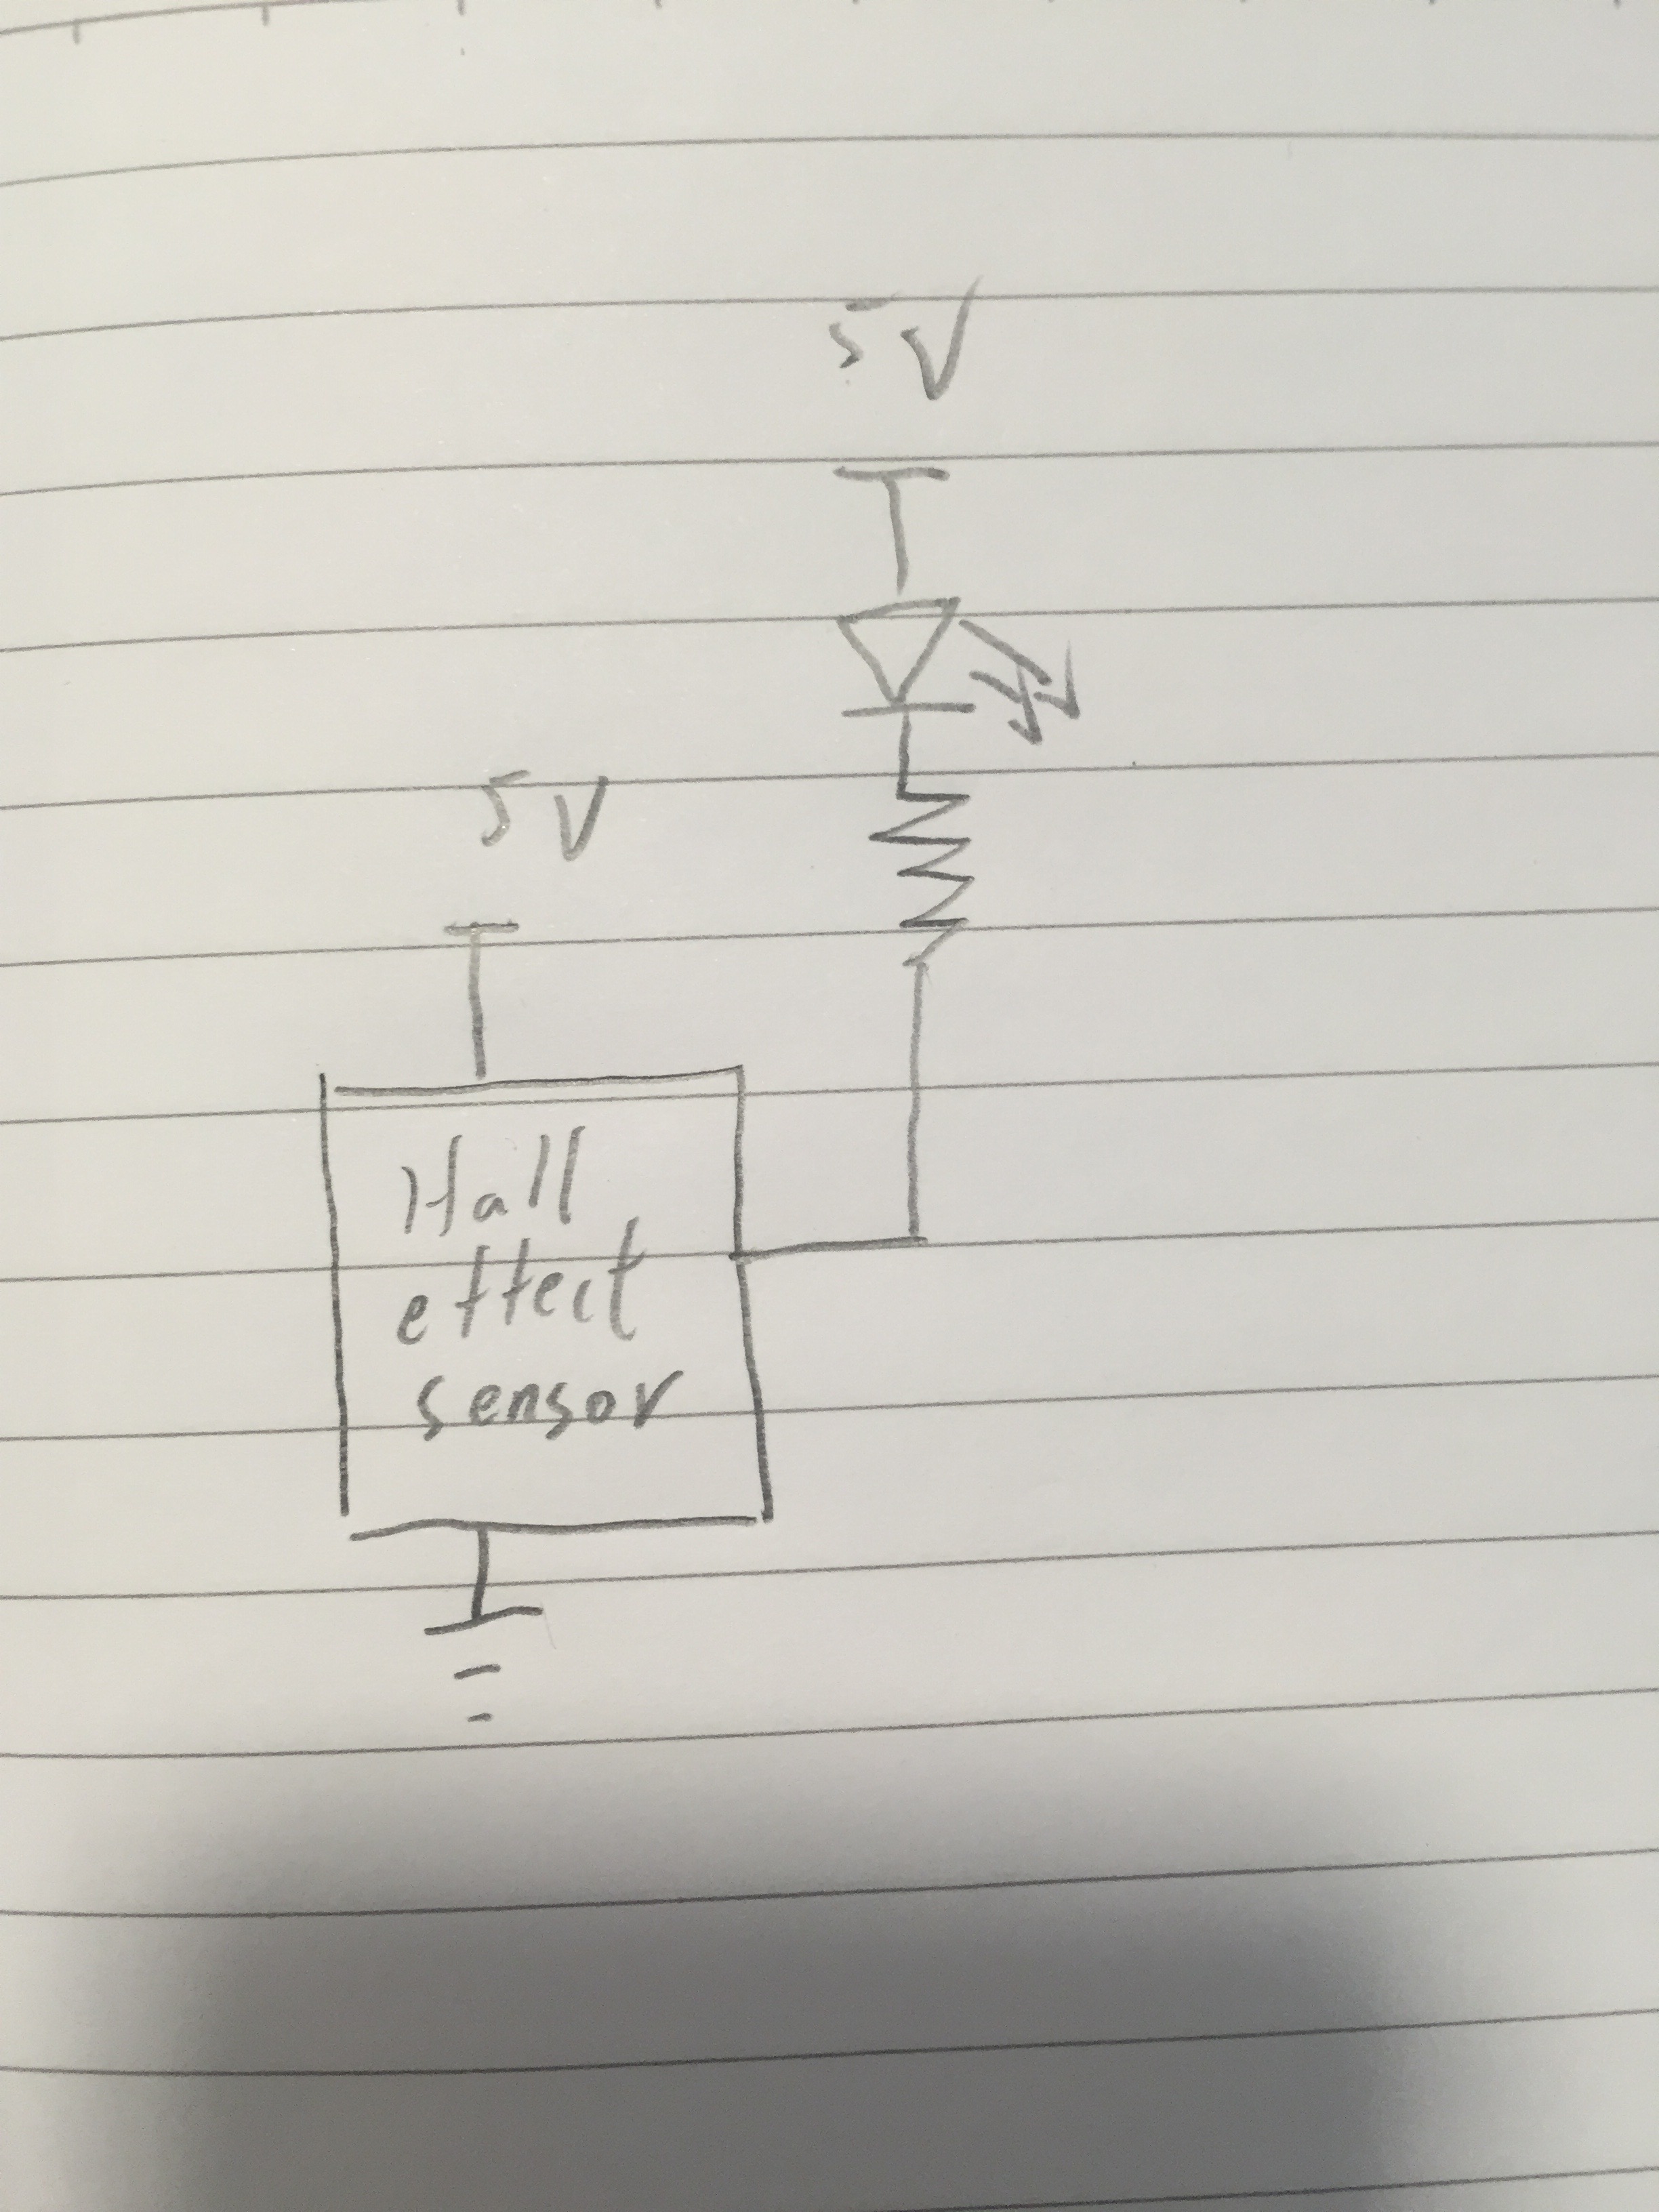
Today we test our hall effect sensor, it works like a switch. We decide to use it as the indicator to control the motor when to stop.
Here is the test circuit:
04/11/16
Block diagram for program:
Today we got the generic high torque continuous rotation servo. So we started to do coding on Arduino and build circuit. We also started to make the tiny window curtain.
04/16/16
Since the magnet will change will status of hall effect sensor twice, Oscar suggests us to use D flip flop to make the output voltage change only at the rising edge of in the input signal.
04/18/16
We finished the circuit part, it run well. We tried to make a paper curtain but it is too fragile. As a result, we went to the ECE shop and asked for help. Hopefully, we will get it before the demo.
04/25/16
We are waiting for the curtain. We fixed some bugs in our code to make the motor run better.
04/27/16
We got our metal structure from the shop today. It looks super cool! However, the friction between the axis and the structure are too high for the servo to turn it. Unfortunately, as we tested servo with a 7.5 voltage battery, the servo died. It burned because of the high voltage supply, the big friction that kept servo from turning or maybe other unknown reason.
04/28/16
We contacted Nate and he suggested us to ask Scott to help us adjusting a 180 degree servo to 360 degree as well as ask Ski to help us reduce the friction between the structure and the axis. We also ordered a 360 motor online to see if we can get it before demo.
04/29/16
Ski and David from the shop helped us with the motor and the structure. It runs pretty well now. We went to the Fab lab and get our structure a piece of fabric for demo. Code for the adjusted 180 degree servo is done. It is hard to control the speed of the adjusted 180 degree servo, so we adjusted its turning position by changing the time it turns with the "delay" command.
04/30/16
We got the new servo today. It turns to be a little bit large for the structure but we fixed it with 3 screws. We fixed a breadboard inside the structure in the opposite side to the servo to hold the hall effect sensor. When we tested the structure, the magnet always stuck on the sensor as the curtain slides down. We solved it by making our curtain narrower. However, sometime the magnet still can not get into the right place.


