Assignment Description
In this lab you will get experience with some of the implementation issues and conceptual details of inheritance. Inheritance is a mechanism for increasing the reusability and reliability of C++ code. It is worth mentioning that inheritance is a characteristic of all object oriented programming languages. Our goal is to give you a glimpse of the functionality of inheritance, so that you can make informed design decisions in the future. Please read through the entire lab before you begin. You can refresh your memory on inheritance here.

Lab Insight
This lab teaches some of the characteristics observed in object oriented programming. These characteristics are useful in software design when building code bases for large projects, APIs, and production code bases. Some classes that further extend on these concepts include CS 427, CS 242, and CS 422. This lab will help you build clean code bases where the OOP (Object-Oriented Programming) characteristics help minimize having to rewrite redundant code as well as make use of virtual inheritance to treat custom sub-classes the same way as their base classes without losing the custom functionality of these subclasses.
Checking Out the Code
All assignments will be distributed via our release repo on github this semester. You will need to have set up your git directory to have our release as a remote repo as described in our git set up
You can merge the assignments as they are released into your personal repo with
git pull --no-edit --no-rebase release main
git push
if you are using multiple machines you may need to use the following to allow them to work correcly.
git pull --no-edit --no-rebase release main --allow-unrelated-histories
git push
The first git command will fetch and merge changes from the main branch on your remote repository named release into your personal. The --no-edit flag automatically generates a commit message for you, and the--no-rebase flag will merge the upstream branch into the current branch. Generally, these two flags shouldn’t be used, but are included for ease of merging assignments into your repo.
The second command will push to origin (your personal), which will allow it to track the new changes from release.
You will need to run these commands for every assignment that is released.
All the files for this lab are in the lab_inheritance directory.
Preparing Your Code
This semester for MPs we are using CMake rather than just make. This allows for us to use libraries such as Catch2 that can be installed in your system rather than providing them with each assignment. This change does mean that for each assignment you need to use CMake to build your own custom makefiles. To do this you need to run the following in the base directory of the assignment. Which in this assignment is the lab_inheritance directory.
mkdir build
cd build
This first makes a new directory in your assignment directory called build. This is where you will actually build the assignment and then moves to that directory. This is not included in the provided code since we are following industry standard practices and you would normally exclude the build directory from any source control system.
Now you need to actually run CMake as follows.
cmake ..
This runs CMake to initialize the current directory which is the build directory you just made as the location to build the assignment. The one argument to CMake here is .. which referes to the parent of the current directory which in this case is top of the assignment. This directory has the files CMake needs to setup your assignment to be build.
At this point you can in the build directory run make as described to build the various programs for the MP.
You will only need to modify the following files:
shape.{cpp,h}circle.{cpp,h}truck.{cpp,h}flower.{cpp,h}drawable.h
Class Hierarchy
To help us understand class hierarchies better here is an example of a simple
class hierarchy showing that a Dog is a Animal.
The code would look something like the following:
class Animal {
   public:
      string name;

      virtual void speak() = 0;
      /* The = 0 at the end of the method means that the method is a pure virtual method
       * meaning that it does not have an implementation and it delegates the task
       * of implementing the method to the classes that is derived from it */
};

class Dog : public Animal {
   public:
      string breed;

      /* Dog inherits speak from Animal */
      void speak();

};

void Dog::speak() {
    cout << "Woof Woof" << endl;
}
In this example Animals have a name and can speak but since speak is a
pure virtual method we CANNOT construct an Animal by itself. That is Animal
is an abstract class and it can only be constructed by one of its derived
classes. For example, a Dog is a derived class of Animal. This means that a
Dog is a Animal, and, therefore, it inherits a name and a speak
method from Animal. However, since the Animal’s speak does not have an
implementation, Dog must implement the speak method.
Here is an example of how we could use a Dog object:
Dog* d = new Dog();

/* Like usual we can access all the public methods and member variables of a
 * Dog */
d->breed;

/* But now since a Dog is an Animal we can also do this too */
d->name;     // inherited from Animal
d->speak();  // inherited from Animal and since it is a Dog speak() will print
             // "Woof Woof"

/* Additionally we can treat our Dog only like an Animal like this */
Animal* a = d;

/* But now we can only do the following */
a->name;
a->speak();  // Still prints "Woof Woof" because speak is a virtual method.

a->breed     // ERROR! This will NOT work since we perceive it as an Animal now

/* Additionally, if we try to have our Animal pointer point back to a Dog
 * pointer this will cause a problem because an Animal Is NOT A Dog. */
Dog* d2 = a;  // ERROR!  Animal Is NOT A Dog

/* Furthermore, since Animal is abstract and has a pure virtual method
 * we CANNOT construct one! */
Animal a2();  // ERROR! Animal is an abstract class
Now that we can understand a simple class hierarchy, let’s look at a more complex one. Here is a diagram depicting the class hierarchy that is used in this lab. (Note: This diagram is missing some information, e.g. methods, member variables, etc.., for demonstration purposes)
This means everything is a Drawable and will have a draw method. Code like
the following is perfectly acceptable:
Drawable* triangle  = new Triangle(....);
Drawable* circle    = new Circle(...);
Drawable* rectangle = new Rectangle(....);
Drawable* truck     = new Truck(...);
Drawable* flower    = new Flower(....);

/* Now the only thing we can use on triangle, circle, rectangle, truck, and
 * flower is draw but what gets drawn will change depending on what type the
 * pointer is actually pointing to. This is called polymorphism, the behavior
 * changes depending on the actual type of the object being pointed to. */

PNG canvas;
triangle->draw(&canvas);   // draws a Triangle even though triangle is a Drawable*
circle->draw(&canvas);     // draws a Circle even though circle is a Drawable*
rectangle->draw(&canvas);  // draws a Rectangle even though rectangle is a Drawable*
truck->draw(&canvas);      // draws a Truck even though truck is a Drawable*
flower->draw(&canvas);     // draws a Flower even though flower is a Drawable*
Look at main.cpp for a working example program in action. main.cpp gets
compiled and linked into an executable named inheritance. Follow the
instructions below to build, run, and view the output:
make
Will build the executable named inheritance for this lab.
./inheritance
Will run the aforementioned executable.
You could also run Valgrind on the executable:
valgrind --leak-check=full ./inheritance
This lab will use all of these objects in interesting ways but as you will quickly see they are not working the way the should. Your objective for this lab is to go through the 5 test executables and fix the code to work correctly by modifying how the classes in the hierarchy declare and implement their methods.
Once you have fixed all the Valgrind errors, you can test your program output following the directions below.
Exercise 1: Fix the Virtual Methods
Please build and run test_virtual:
make test_virtual                   # compile to produce test_virtual executeble
valgrind ./test_virtual             # run test_virtual with valgrind
As you will see when you run test_virtual, the output will say:
The Perimeters are NOT the same.
The Areas are NOT the same.
However, if you look closely at the code they should be the same because both
of the pointers in test_virtual.cpp point to the same object!
Exercise
- Investigate and fix the code so that the areas and the perimeters are the same.
- To fix this problem you should only need to modify
shape.cppand/orshape.h.
Exercise 2: Fix the Destructor
Please build and run test_destructor:
make test_destructor                         # compile to produce test_destructor executeble
valgrind --leak-check=full ./test_destructor # run test_destructor in valgrind
When you run test_destructor in Valgrind you will see that
test_destructor is leaking memory. However, if you look closely, Triangle
does have a valid destructor and it is being called in test_destructor!
Exercise
- Investigate and fix the code so that the there is no more memory leak inside
of
test_destructor. - To fix this problem you should only need to modify
drawable.handshape.h.
Exercise 3: Fix the Constructor
Please build and run test_constructor:
make test_constructor # make test_constructor
./test_constructor    # run test_constructor
When you run test_constructor you will see the following output:
Circle's color is NOT correct!
Circle's center is NOT correct!
If you look closely, we are constructing a Circle with a valid center and
color. However, when it is being drawn and when we ask for the Circle’s
center and color they are not the same!
Exercise
- Investigate and fix the code so that the
Circleis being constructed with the proper center and color. - To fix this problem you should only need to modify
circle.cpp - The correct
test_constructor.pngshould look like the following:

Exercise 4: Fix the Pure Virtual Method
Please build and run test_pure_virtual.
make test_pure_virtual # make test_pure_virtual
./test_pure_virtual    # run test_pure_virtual
When you try to make test_pure_virtual you will see that it does not compile.
However, if you look at the truck.{h,cpp} it is a fully featured class! Why
is it not compiling?
Exercise
- Investigate and fix the code so that
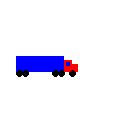
test_pure_virtualcompiles, runs, and outputs aTruck. - To fix this problem you should only need to modify
truck.handtruck.cpp. - In order to have the
Truckdraw properly you will first need to have Exercise 3 completed. - Note the order you draw the shapes matters and the original code is in the correct order.
- The correct
test_pure_virtual.pngshould look like the following:
Exercise 5: Fix the Slicing
Please build and run test_slicing with:
make test_slicing # make test_slicing
./test_slicing    # run test_slicing
After you run test_slicing open up its output test_slicing.png. You will
see that a Flower has NOT been drawn. For some reason just a bunch of X’s has
been drawn and a red circle.
If you look at flower.h and flower.cpp, we have all of the proper member
variables set up. However, when we try to draw them they are drawn incorrectly.
Exercise
- Investigate and fix the code so that
test_slicingoutputs aFlower. - To fix this problem you should only need to modify
flower.handflower.cpp. - You must use polymorphism!
- The correct
test_slicing.pngoutput should look like the following:

Testing Your Code
Run the Catch tests as follows (this requires your code to compile when run simply as make):
make test
./test
Cleaning up files
To clean up your working repository and remove the test images produced by your program, you can type the following command:
make clean
Submitting Your Work
The following files are used to grade this assignment:
shape.cppshape.hcircle.cppcircle.htruck.cpptruck.hflower.cppflower.hdrawable.h
All other files including any testing files you have added will not be used for grading. Remember that submissions must be done through Prairielearn!