Solo MP: This MP is to be completed without a partner.
You are welcome to get help on the MP from course staff, via open lab hours, or Piazza!
Getting the files
From your CS 225 git directory, run the following on EWS:
git fetch release
git merge release/mp_intro -m "Merging initial mp_intro files"
If you see an error about unrelated histories, you may need to run:
git fetch release
git merge --allow-unrelated-histories release/mp_intro -m "Merging initial mp_intro files"
Upon a successful merge, your mp_intro files are now in your mp_intro directory.
Adding your HSLAPixel class to this project
Before starting this MP, make sure you have finished lab_intro.
- Copy your
cs225/HSLAPixel.cppandcs225/HSLAPixel.hfiles fromlab_introintomp_intro. - Just like in
lab_intro, these files both go into thecs225directory within the assignment folder.
Part 1: Create a Makefile
In CS 225, we feel it’s important you understand how a C++ program compiles.
Go through the Makefile Tutorial and create a Makefile for this assignment. You may find the lab_intro Makefile useful as a reference.
Your Makefile must compile together your own solution files, namely main.cpp, intro.h, intro.cpp, and files in the cs225 directory. Do not have typos in your file names or your Makefile! For example, make sure your Makefile compiles a file named main.cpp, not a file named main.C or test.cpp or any other such thing.
Please make sure your Makefile does not compile extra files that are not part of this MP. For example, do not add in files from the Makefile tutorial by mistake; the only files the Makefile should be dealing with are the few listed in the paragraph above.
Your Makefile must produce an executable called intro (all lowercase).
After creating a Makefile that builds intro, the following two lines can be added to the end of your Makefile so that you can also build the test cases:
test: tests.o PNG.o HSLAPixel.o lodepng.o intro.o
	$(LD) tests.o PNG.o HSLAPixel.o lodepng.o intro.o $(LDFLAGS) -o test

tests.o: tests/tests.cpp tests/catch.hpp cs225/PNG.h cs225/HSLAPixel.h
	$(CXX) $(CXXFLAGS) tests/tests.cpp
Part 2: Rotate an Image
Open intro.cpp and complete the rotate function. This function must:
- Read in
inputFile, - Rotate the image 180 degrees,
- Write the rotated image out as
outputFile
Here’s alma.png rotated 180 degrees:
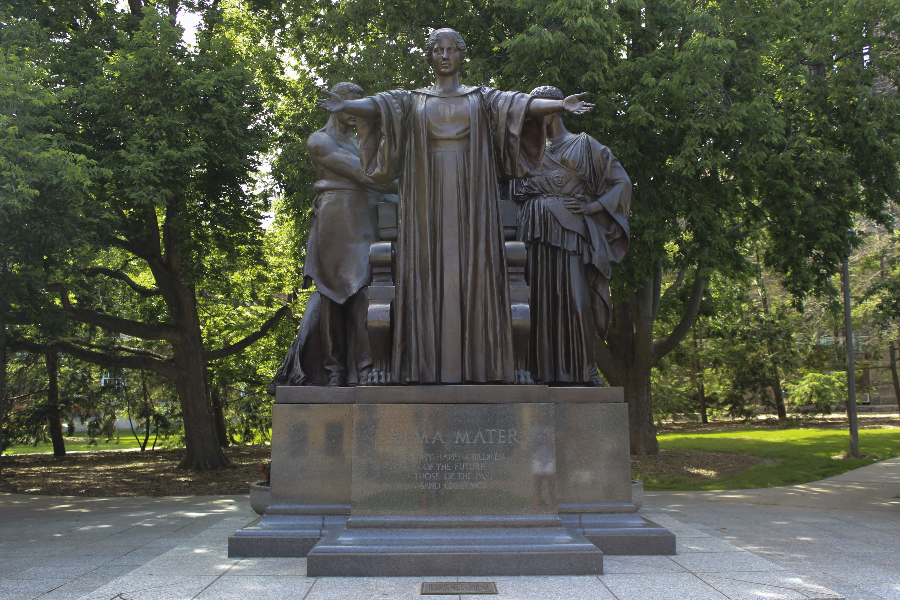 in.png
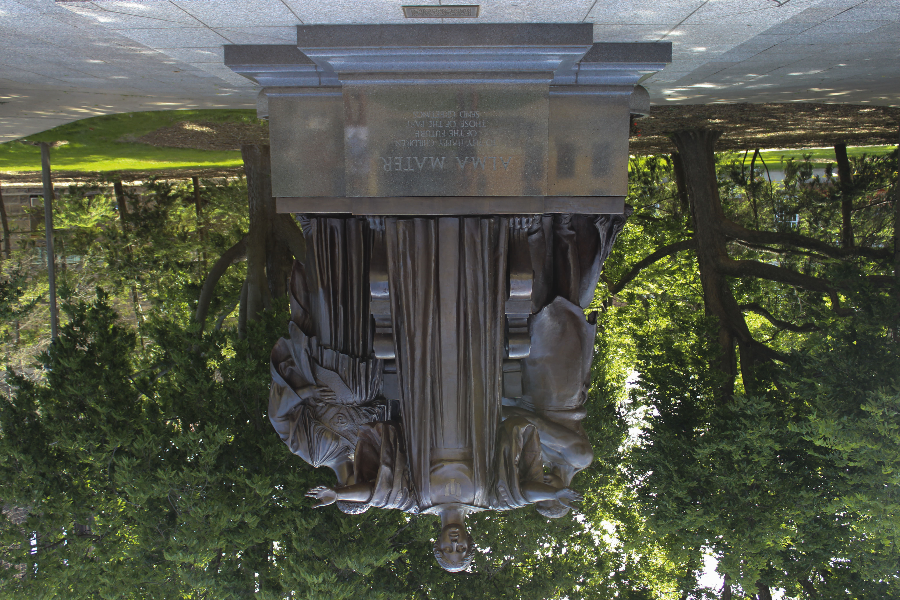 out.png
In order to complete this, you will need to make use of CS 225’s PNG class, which you learned about in lab_intro.
Hint: Take a piece of paper and draw a 5x5 grid on it. Mark the box at (0, 1). Rotate that paper 180 degrees and note where the marked box is now located. Repeat for other squares if necessary.
Can you find the pattern/formula for how the pixel moves?
Testing Part 2
The Makefile you created in Part 1 must produce an intro executable (all lower case intro). The following command must make intro:
make
A main has been provided for you that will call your rotate to read in in.png and output out.png. With that, you may use the given files in_01.png, out_01.png, in_02.png, out_02.png, in_03.png, and out_03.png to test your program. First, copy in_01.png to in.png by typing
cp in_01.png in.png
Then run your program:
./intro
Finally, compare the output by opening each file and looking at them or using diff to compare your output to the expected output:
diff out.png out_01.png
If diff exits without any output, then the files are the same! :)
Part 3: Getting Creative
Daniel O’Brien, fellow Illini and CS 225 alumni, created a website that now attracts over 40,000 followers that displays randomly generated fusions of color that are both mesmerizing and beautiful. Here are just a few:






Generate Your Own Colored Background
Open up intro.cpp and complete the myArt function. The myArt function must:
- Return a
widthxheightPNG image that contains original art you have created.- The
widthandheightof your image will always be the same – every image generated must be a square. - By default, the
widthandheightare both800. Your TA will see your art rendered at 800 x 800. - You should focus on making sure your art looks the way you like at 800 x 800. However, your art must scale to any size (eg: be generic).
- The
- Your art must be unique and something you find beautiful or meaningful. There are very few requirements:
- Your art must contain at least three unique colors.
- Your art must not contain any external resources (eg: no loading an image from disk/web)
That’s it – everything else is up to you! You are highly encouraged to use gradients, fractals, or other designs in your art. More than anything else, have fun! As an extra bit, course staff will award +1 point to designs that are particularly unique, creative, beautiful, or stand out from other designs. Feel free to share it both on Piazza and across social media with #cs225!
Finally, you will make use of and see your artwork later in the semester. Make it something you’ll be happy to see. :)
Testing Part 3
The main.cpp provided for you will produce your artwork instead of an image if you run ./intro with a command line parameter. If you provide a number after ./intro, it will save your artwork as art.png. For example:
./intro 800
Sharing Your Art
If you share your art on Facebook, Twitter, or Instagram with #cs225, I will or the post as soon as I see it. I think many of your peers will too! — Wade
Autograder Testing
We have provided a few automated tests that will test your Part 2 code only. You can run a subset of the test cases that will be used in the autograder with the following commands:
make test
./test
Grading and Submission
You must submit your work to git for grading. We will use the following files for grading:
Makefilecs225/HSLAPixel.cppcs225/HSLAPixel.hintro.cpp
All other flies will be ignored in grading.