C++: Compiling, Linking, and CMake
For your final project, you are going to use going to need to use some additional library. In order to do this, you'll need to understand the basics about C++ build process.
Build systems
There are a multitude of open-source build systems for C++:
- plain old Makefiles using GNU
Make, designed by Stu Feldman CMakeby KitwareBuckby FacebookBazelby GoogleNinja
Also, most of the above C++ build system are also language agnostic, so they are just general purpose build systems.
We are going to be using CMake, since it is typically the standard for high
level build systems for C++ projects.
The build process
When you click the Green 🔨 button in CLion, 3 events occur (in this order):
- Preprocessing
- Compiling
- Linking
The Preprocessor
Any statements starting with a # are called preprocessor directives. These
directives are typically used to organize projects (via #include), selectively
compile pieces of code (via #define, usually for platform reasons),
and to create macros (also via #define). There are other uses cases too, but
these are the main use cases you'll encounter.
An important topic is #include statements. In order to use other pieces of
code, your current code will need to known of the existence of other pieces of
code. A header file is a file that typically contains declarations of existing
code: in other words, they typically signify the existence of an implementation.
Including header files in your code will allow you to compile the code.
It is important to understand that the extension of your header file doesn't
matter since the compiler never sees the header file (think about what
#include does) and won't try to process it.
Now, there are two ways to include a file. For example:
#include <nlohmann/json.hpp>
or
#include "nlohmann/json.hpp"
The <> syntax means that the preprocessor will search for the specified
file from a list of system headers and user-specified include directories.
The "" syntax will typically make the preprocessor start the search
relative to the file in which the directrive was used. If that fails,
the preprocessor will fall back to using the <> syntax. This means that
using "" is stronger than using <>. Typically, you'll want to use the
"" syntax when the file you specified is actually the relative path specified.
If the file to be included is in a parent directory, you should use the <>
syntax. For this project, if you ever find yourself typing
#include "../../some/file.h", you are probably doing something incorrectly.
See more about the preprocessor here: https://en.wikipedia.org/wiki/C_preprocessor.
The Compiler
The compiler is responsible for generating a corresponding object file from each inputted compilation unit (usually referred to as a translation unit). A translation unit contains the source file after the preprocessor is done expanding and preprocessing the file.
Some common C++ compilers and environments are:
gcc/g++, GNU environmentclang/clang++, LLVM environmentMSVC, Microsoft Visual C++ environmentMinGW/MSYS2, "Minimalist GNU for Windows" environmentCygwin, yet another C++ environment for Windows
So, let's say you are using g++. Then you would compile your library files
like:
g++ -std=c++11 -c hello.cc world.cc
(for C++ 11 features in this case). Then this will generate
hello.o and world.o, which are object files.
A library can then be created using these object files.
The Linker
This is where everything comes together!
When you create an executable, you'll need to link individual object files or libraries together. This step is crucial, because in this step all of the symbols are verified, and the linker ensures that symbols have definitions, well, at least when using static libraries.
Check out this blog post for more information.
CMake
Why the #$@&%*! are we using CMake? Why not use XCode or Visual Studio?
In order to get you prepared for CS 225 and summer internships, we thought it would be useful to understand build systems. XCode and Visual Studio both have integrated build systems, so if something goes wrong, it is very hard to determine what the root cause is. With CMake, you are in control of building your project, so it is more configurable and flexible. CS 225 will use Makefiles, which are even more low level than CMake. CMake can generate Makefiles.
Basic functions
- Use
add_executable(name source1 [source2 ...])to make a new executable. For your final project, you probably won't need to use this. - Use
add_library(name source1 [source2 ...])to make a new library. You might use this if you are using a Cinder Block that does not provide aCMakefile. - Use
target_link_librariesto link libraries to a target. Note that a target is a CMake construct, which could either be an executable or another library. - Use
target_include_directories(target [items1...])to add a directory to the user-specified include directories.
This is pretty much all you'll need to know from vanilla CMake.
Before you get started
For some reason, the cmake files we distributed cause an annoying deprecation warning to
be displayed in red text. You can supress these warning by going
to File > Settings > Build, Execution, Deployment > CMake, and then for the CMake options,
add -Wno-dev. The warning has to do with old CMake syntax.
Using external libraries
Here are some more commands that will probably be used for this project.
Below are examples. You should be able to follow the pattern. You don't need to know every little detail.
Typical CMake Library on a Git Server
In final-project-<github-name>/CMakeLists.txt:
FetchContent_Declare(
    gflags
    GIT_REPOSITORY https://github.com/gflags/gflags.git
    GIT_TAG v2.2.2
)
This will download a Git repository into your build folder. The first argument is the name that you want to refer to the entity as.
Then, you'll do something like this, still in final-project-<github-name>/CMakeLists.txt:
FetchContent_GetProperties(gflags)
if(NOT gflags_POPULATED)
    FetchContent_Populate(gflags)
    add_subdirectory(${gflags_SOURCE_DIR} ${gflags_BINARY_DIR})
endif()
Notice that gflags is a CMake project, so you can add it as a subdirectory
of your project. This piece of code adds gflags as a subdirectory of your
project, which will expose any targets that gflags defines.
NOTE: It is important that your variable names are all lowercase for FetchContent.
The FetchContent_Populate(<name>) method will convert <name> into lowercase,
so just make all of the names lowercase. See more here:
https://cmake.org/pipermail/cmake/2018-March/067185.html.
Header-only Library on a Git Server
Header-only libraries are pretty common in C++. One advantage of a header-only
library is that there is no need to link, so it is typically seen as very
simple to integrate into an existing project because you only need to
include the header file(s). A downside is that every time you compile your
program, you potentially have to compile the entire header-only library
into your translation unit(s). This will lead to slow compile times.
Catch2 is an example of a header-only library.
In final-project-<github-name>/CMakeLists.txt:
FetchContent_Declare(
    catch2
    GIT_REPOSITORY https://github.com/catchorg/Catch2.git
    GIT_TAG        v2.11.1
)
and then:
FetchContent_GetProperties(catch2)
if(NOT catch2_POPULATED)
    FetchContent_Populate(catch2)
    add_library(catch2 INTERFACE)
    target_include_directories(catch2 INTERFACE ${catch2_SOURCE_DIR}/single_include)
endif()
Notice that this second block is a little different then what we previously did.
Whether or not Catch2 is a CMake project, all we need are the header files
that need to be included. So we create a new library called catch2, which
is declared as an INTERFACE, which just means that there are no source files
to compile. Then, we specify which files should be added to the user-specified
include directories if this library is to be used.
The directory single_include/ is specific to Catch2, so you'll have to see
which directory your project needs in order to include header files. For example,
in the snake application, we used
SQLiteModernCpp
which has its include directory as hdr/.
These header-only libraries will typically be painless to integrate into your project.
Cinder Blocks
First, let's say your cinder folder is at ~/Cinder.
NOTE: this might be different on your machine!! It might be ~/Downloads/Cinder
or it could be /Users/rey/CLionProjects/Cinder, or it could be
C:\Users\rey\Downloads\cinder_vs2015_0.9.2, or C:\Users\rey\cinder_vs2015_0.9.2\cinder_vs2015_0.9.2,
or /Users/rey/Downloads/cinder_0.9.2, etc.
Formally, ${CINDER_PATH} is defined as the directory where the directory
${CINDER_PATH}/proj/cmake exists. Many of you had the pleasure of seeing this CMake
error message when trying to load the CMake snake project. This should clear up
some misunderstandings. So for example, your snake project already resides
in the ${CINDER_PATH}/my-projects/snake-<your-github-username>.
In CMake, you should define and literally use the variable ${CINDER_PATH} to refer to your
Cinder location.
Okay, next let's say you want to use the Cinder-Notifications
CinderBlock. Here is what you need to do:
- On GitHub, make a fork of the Cinder Block. An image is below:
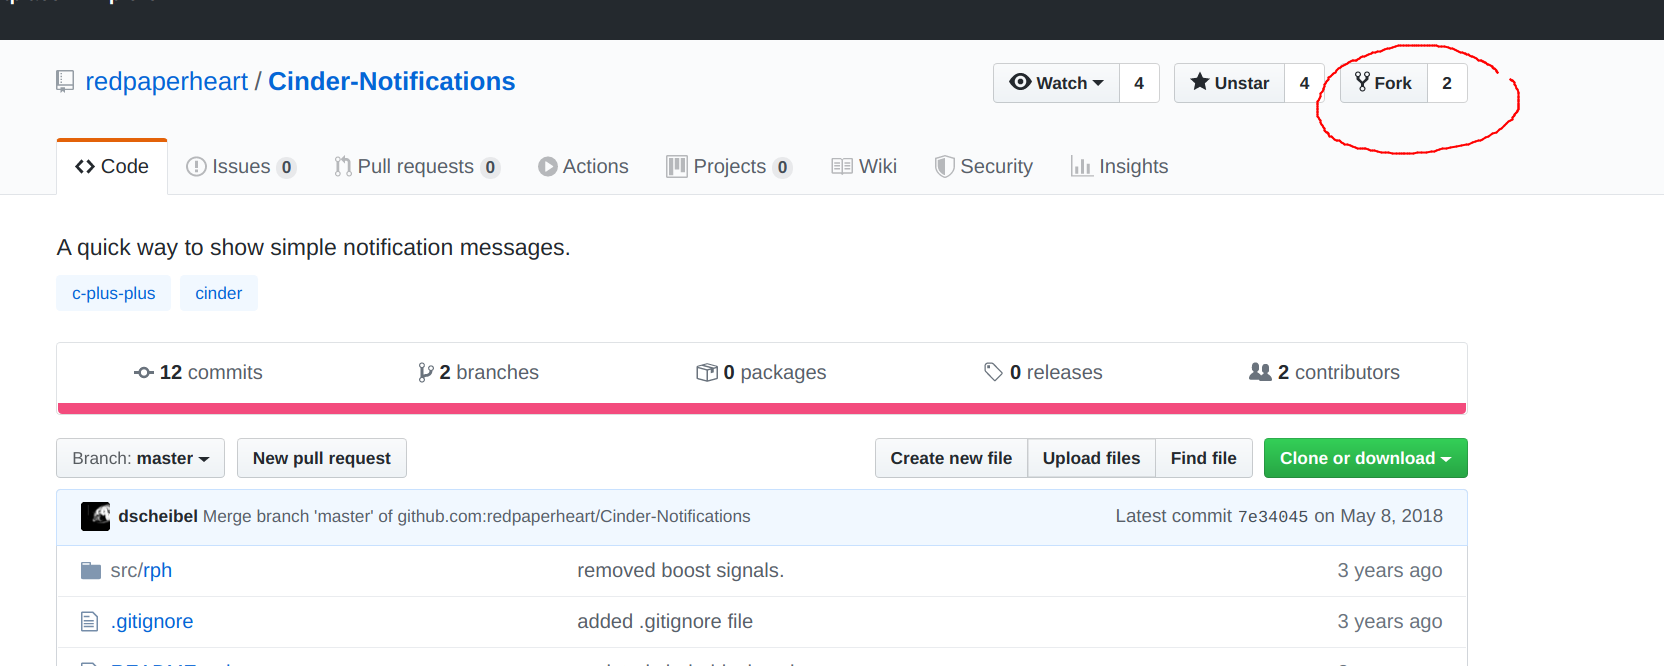
Note that this isn't necessarily required, but it is typically what you would do if you want to make changes to a repo you don't own on GitHub.
-
In CLion, go to
VCS > Get from Version Control, and then clone your forked version of the Cinder Block into${CINDER_PATH}/blocks/<name-of-cinder-block-repo>using the exact same name as the repo on GitHub. So forCinder-Notifications, you would typehttps://github.com/redpaperheart/Cinder-Notifications.gitas the URL, and${CINDER_PATH}/blocks/Cinder-Notificationsas the directory. Remember, you won't type${CINDER_PATH}literally, you type whatever this path is on your machine. Then click theClonebutton and open the repo in a new window. -
If your Cinder Block is already a CMake project, then you shouldn't need to follow the rest of these steps. In the new window, open up the
cinderblock.xmlfile. Take a close look at this file. This files tells you what files need to be compiled and which directories need to be included. For example, in${CINDER_PATH}/blocks/Cinder-Notifications/cinderblock.xml, there is:
<?xml version="1.0" encoding="UTF-8" ?>
<cinder>
<block
	name="Cinder-Notifications"
	id="com.redpaperheart.notifications"
	author="Red Paper Heart"
	summary="A Cinder block to add simple growl-like notifications to your project."
  version="0.1"
	url="https://github.com/redpaperheart/Cinder-Notifications"
	git="https://github.com/redpaperheart/Cinder-Notifications.git"
	>
    <includePath>src</includePath>
    <header>src/rph/NotificationManager.h</header>
    <source>src/rph/NotificationManager.cpp</source>
    <header>src/rph/Notification.h</header>
    <source>src/rph/Notification.cpp</source>
</block>
</cinder>
This is giving you some instructions on how to build this project.
First, make the file ${CINDER_PATH}/blocks/Cinder-Notifications/proj/cmake/Cinder-NotificationsConfig.cmake,
and place the following inside:
if(NOT TARGET Cinder-Notifications)
  # Define ${Cinder-Notifications_PROJECT_ROOT}. ${CMAKE_CURRENT_LIST_DIR} is just the current directory.
  get_filename_component(Cinder-Notifications_PROJECT_ROOT "${CMAKE_CURRENT_LIST_DIR}/../.." ABSOLUTE)

  # Define ${CINDER_PATH} as usual.
  get_filename_component(CINDER_PATH "${Cinder-Notifications_PROJECT_ROOT}/../.." ABSOLUTE)

  # Make a list of source files and define that to be ${SOURCE_LIST}.
  file(GLOB SOURCE_LIST CONFIGURE_DEPENDS
    "${Cinder-Notifications_PROJECT_ROOT}/src/rph/NotificationManager.cpp"
    "${Cinder-Notifications_PROJECT_ROOT}/src/rph/Notification.cpp"
  )

  # Create the library!
  add_library(Cinder-Notifications ${SOURCE_LIST})

  # Add include directories.
  # Notice that `cinderblock.xml` has `<includePath>src</includePath>`.
  # So you need to set `../../src/` to include.
  target_include_directories(Cinder-Notifications PUBLIC "${Cinder-Notifications_PROJECT_ROOT}/src" )
  target_include_directories(Cinder-Notifications SYSTEM BEFORE PUBLIC "${CINDER_PATH}/include" )


  # If your Cinder block has no source code but instead pre-build libraries,
  # you can specify all of them here (uncomment the below line and adjust to your needs).
  # Make sure to use the libraries for the right platform.
  # # target_link_libraries(Cinder-Notifications "${Cinder-OpenCV_PROJECT_ROOT}/lib/libopencv_core.a")

  if(NOT TARGET cinder)
    include("${CINDER_PATH}/proj/cmake/configure.cmake")
    find_package(cinder REQUIRED PATHS
        "${CINDER_PATH}/${CINDER_LIB_DIRECTORY}"
        "$ENV{CINDER_PATH}/${CINDER_LIB_DIRECTORY}")
  endif()
  target_link_libraries(Cinder-Notifications PRIVATE cinder)

endif()
Sometimes, there are a lot of source files. Instead of declaring each and
every file in ${SOURCE_LIST}, you can just use a CMake GLOB pattern for them instead:
  file(GLOB SOURCE_LIST CONFIGURE_DEPENDS
    "${Cinder-Notifications_PROJECT_ROOT}/src/**/*.h"
    "${Cinder-Notifications_PROJECT_ROOT}/src/**/*.hpp"
    "${Cinder-Notifications_PROJECT_ROOT}/src/**/*.cc"
    "${Cinder-Notifications_PROJECT_ROOT}/src/**/*.cpp"
    "${Cinder-Notifications_PROJECT_ROOT}/src/**/*.c"
    "${Cinder-Notifications_PROJECT_ROOT}/src/*.h"
    "${Cinder-Notifications_PROJECT_ROOT}/src/*.hpp"
    "${Cinder-Notifications_PROJECT_ROOT}/src/*.cc"
    "${Cinder-Notifications_PROJECT_ROOT}/src/*.cpp"
    "${Cinder-Notifications_PROJECT_ROOT}/src/*.c")
You don't really need the .h/.hpp/.H files in the GLOB though.
Once you are done with this step, you can commit and push your changes to your fork. And if you want to, you can even create a Pull Request on the original CinderBlock GitHub repository with your fork!
Linking
Now, there are three targets by default in your project folder:
cinder-myapp, mylibrary, and test. You are free to change the names of these
targets, just make sure to do a find and replace.
- The
cinder-myapptarget is configured infinal-project/apps/CMakeLists.txt. - The
mylibrarytarget is configured infinal-project/src/CMakeLists.txt. - The
testtarget is configured infinal-project/tests/CMakeLists.txt.
Fortunately, Cinder has some nice macros that take care of the
CMake commands that are needed to build your project (i.e., add_library, add_executable, etc.).
In final-project/src/CMakeLists.txt, you'll find the macro ci_make_library:
ci_make_library(
        LIBRARY_NAME mylibrary
        CINDER_PATH  ${CINDER_PATH}
        SOURCES      ${SOURCE_LIST}
        INCLUDES     "${FinalProject_SOURCE_DIR}/include"
        LIBRARIES
        BLOCKS
)
This is a custom modification of the Cinder's ci_make_app macro, just adapted
for libraries instead. This means that unlike the snake application, you'll
be able to use libcinder and other Cinder Blocks in your library.
The test target is defined with the ci_make_app macro:
ci_make_app(
    APP_NAME    test
    CINDER_PATH ${CINDER_PATH}
    SOURCES     ${SOURCE_LIST}
    LIBRARIES   mylibrary catch2
    BLOCKS
)
The cinder-myapp target is defined with the ci_make_app macro:
ci_make_app(
    APP_NAME    cinder-myapp
    CINDER_PATH ${CINDER_PATH}
    SOURCES     ${SOURCE_LIST}
    LIBRARIES   mylibrary
    BLOCKS
)
You can link to Cinder Blocks as well by adding the names of the Cinder Blocks to
the BLOCKS parameter. So for Cinder-Notifications, you would just do:
ci_make_app(
    APP_NAME    cinder-myapp
    CINDER_PATH ${CINDER_PATH}
    SOURCES     ${SOURCE_LIST}
    LIBRARIES   mylibrary
    BLOCKS      Cinder-Notifications
)
after you have added it's Configure.cmake file mentioned in the previous section.
Note, that Cinder Blocks are open source and might be out of date or not active.
So for example, when I tried to run my cinder-myapp target after adding the Cinder-Notifications
Cinder Block, I got an error saying that some include path couldn't be found.
I had to modify Cinder-Notifications/src/rph/NotificationManager.h
to include cinder/Timeline.h instead of cinder/timeline.h.
You can read more here.
Using your Cinder Block
Now, from the setup above, you are able to use your Cinder Block for files in the
cinder-myapp target. So in final-project/apps/my_app.cc, I can write:
// Copyright (c) 2020 Ken Bone. All rights reserved.

#include "my_app.h"

#include <cinder/app/App.h>
#include <rph/NotificationManager.h>

namespace myapp {

using cinder::app::KeyEvent;

MyApp::MyApp() { }

void MyApp::setup() {
  rph::NotificationManager::getInstance()->add("Hello, World!", 10);
}

void MyApp::update() { }

void MyApp::draw() {
  cinder::gl::clear();
  rph::NotificationManager::getInstance()->draw();
}

void MyApp::keyDown(KeyEvent event) { }

}  // namespace myapp
to use the Cinder Block.
Using your CMake project
After you used FetchContent, you just need to add the target
to the LIBRARIES argument for the ci_make_xxx macro(s).
Make sure you are using the correct target name if you went the add_subdirectory()
route. The README.md or USAGE.md file of the CMake library might have
some more instructions.
Cinder Samples
You can run some of the included sample projects that are located in the
${CINDER_PATH}/samples directory. Just open one of the projects in CLion,
and then you have the Load the proj/cmake/CMakeLists.txt file, if it isn't
loaded automatically.
Running into problems
Unfortunately, the CS 126 staff has probably never used whichever library you intend to use, so you'll probably know more about the library than we do. We can attempt to help with generic CMake issues, but you'll have to try on your own as well.
If you decide to make a Piazza post, please be as detailed as possible: the more detailed you are, the more likely someone will attempt to help you. So this means that at a minimum, you should have the following components in your question:
- An informative title. Titles that are similar to "My code doesn't work" or "CMake not working" are not informative. A good title would be "Box2D fails to link on MacOS with 'Undefined reference to ...'".
- A short summary of the problem you are facing. Be descriptive. Again, "It's not working" is not descriptive.
- The behavior you expect.
- The behavior you observe.
- Important: A screenshot or text snippet of the relevant error message. A screenshot is typically better since with a text snippet, you may forget to include some important information.
- Your Platform. Example,
macOS 10.15.3, Apple clang version 11.0.0 - How to reproduce the issue
- Additional context
Here is a good example: https://github.com/catchorg/Catch2/issues/1863.
Also, you can make CMake related posts public. Some other people might be running into the same problem.
Whew, that's a lot to read ...
Hopefully, you now understand CMake a little better.
Here is the book where this file structure was taken from.
Below are some case studies.
Case Studies
Hebali/ciSpeech
The cinderblock.xml file is:
<?xml version="1.0" encoding="UTF-8" ?>
<cinder>
<block
	name="ciSpeech"
	id="org.foil.sphinx"
	author="Patrick Hebron"
	summary="CMU pocketsphinx support for Cinder."
	license="BSD"
	>
	<supports os="macosx" />
	<includePath system="true">include</includePath>
	<includePath system="true">include/pocketsphinx</includePath>
	<includePath system="true">include/sphinxbase</includePath>
	<headerPattern>include/sphinx/*.hpp</headerPattern>
	<sourcePattern>src/sphinx/*.cpp</sourcePattern>
	<platform os="macosx">
		<staticLibrary>lib/macosx/libpocketsphinx.a</staticLibrary>
		<staticLibrary>lib/macosx/libsphinxbase.a</staticLibrary>
	</platform>
</block>
</cinder>
Note that this CinderBlock is only supported on MacOS.
Here is what needs to be added in
${CINDER_PATH}/blocks/ciSpeech/proj/cmake/ciSpeechConfig.cmake:
if(NOT TARGET ciSpeech)
  # Define ${ciSpeech_PROJECT_ROOT}. ${CMAKE_CURRENT_LIST_DIR} is just the current directory.
  get_filename_component(ciSpeech_PROJECT_ROOT "${CMAKE_CURRENT_LIST_DIR}/../.." ABSOLUTE)

  # Define ${CINDER_PATH} as usual.
  get_filename_component(CINDER_PATH "${ciSpeech_PROJECT_ROOT}/../.." ABSOLUTE)

  # Translate the <staticLibrary> tag.
  # pocketsphinx
  add_library(pocketsphinx STATIC IMPORTED)
  set_property(TARGET pocketsphinx PROPERTY IMPORTED_LOCATION "${ciSpeech_PROJECT_ROOT}/lib/macosx/libpocketsphinx.a")

  # sphinxbase
  add_library(sphinxbase STATIC IMPORTED)
  set_property(TARGET sphinxbase PROPERTY IMPORTED_LOCATION "${ciSpeech_PROJECT_ROOT}/lib/macosx/libsphinxbase.a")

  # Translate the <sourcePattern> tag.
  file(GLOB SOURCE_LIST CONFIGURE_DEPENDS
    "${ciSpeech_PROJECT_ROOT}/src/sphinx/*.cpp"
  )

  # Create the library from the source files. The target is now defined.
  add_library(ciSpeech ${SOURCE_LIST})

  # Link the prebuilt libraries.
  target_link_libraries(ciSpeech pocketsphinx sphinxbase)

  # Translate <includePath> tag.
  target_include_directories(ciSpeech PUBLIC
    "${ciSpeech_PROJECT_ROOT}/include"
    "${ciSpeech_PROJECT_ROOT}/include/pocketsphinx"
    "${ciSpeech_PROJECT_ROOT}/include/sphinxbase"
  )

  # Translate <headerPattern> tag.
  target_include_directories(ciSpeech PRIVATE
    "${ciSpeech_PROJECT_ROOT}/include/sphinx"
  )

  target_include_directories(ciSpeech SYSTEM BEFORE PUBLIC "${CINDER_PATH}/include" )
endif()
cwhitney/PretzelGui
Here is the cinderblock.xml file:
<?xml version="1.0" encoding="UTF-8" ?>
<cinder>
  <block
  	name="PretzelGUI"
  	id="com.sharkbox.pretzel"
  	author="Charlie Whitney"
  	summary="A GUI built from the ground up for Cinder 0.9.x"
	git="https://github.com/cwhitney/PretzelGui"
  	>
	<supports os="macosx" />
	<supports os="msw" />

	<headerPattern>src/pretzel/*.h</headerPattern>
	<headerPattern>src/modules/*.h</headerPattern>
	<headerPattern>src/components/*.h</headerPattern>

	<sourcePattern>src/components/*.cpp</sourcePattern>
	<sourcePattern>src/modules/*.cpp</sourcePattern>


	<platform os="macosx">
		<source compileAs="mm">src/pretzel/PretzelGlobal.cpp</source>
		<source>src/pretzel/PretzelGui.cpp</source>
	</platform>
	<platform os="msw">
		<sourcePattern>src/pretzel/*.cpp</sourcePattern>
	</platform>

	<includePath>src</includePath>

	<resource
		name="PRETZEL_GUI_SKIN"
		type="IMAGE"
		>resources/default_skin.png</resource>
	<resource
		name="PRETZEL_HSL_BAR"
		type="IMAGE"
		>resources/hslBar.png</resource>
  </block>
</cinder>
This cinderblock.xml file is a little more involved.
Notice how the compilation claims to be platform dependent.
It actually is not, since it makes some assumptions.
We have tested this on MacOS. For Windows, we had to mess around with the PretzelGui
source code, so this was not ideal.
Also for this project, there are <resource> tags.
So, your ${CINDER_PATH}/blocks/PretzelGui/proj/cmake/PretzelGuiConfig.cmake
file will look like:
if(NOT TARGET PretzelGui)
  # Define ${PretzelGui_PROJECT_ROOT}. ${CMAKE_CURRENT_LIST_DIR} is just the current directory.
  get_filename_component(PretzelGui_PROJECT_ROOT "${CMAKE_CURRENT_LIST_DIR}/../.." ABSOLUTE)

  # Define ${CINDER_PATH} as usual.
  get_filename_component(CINDER_PATH "${PretzelGui_PROJECT_ROOT}/../.." ABSOLUTE)

  file(GLOB SOURCE_LIST CONFIGURE_DEPENDS
    "${PretzelGui_PROJECT_ROOT}/src/components/*.cpp"
    "${PretzelGui_PROJECT_ROOT}/src/modules/*.cpp"
    "${PretzelGui_PROJECT_ROOT}/src/pretzel/*.cpp"
  )

  # Translate the <sourcePattern> tag.
  add_library(PretzelGui ${SOURCE_LIST})

  # Compile this file as .mm for macosx. You should remove this line if you are on Windows
  set_source_files_properties("${PretzelGui_PROJECT_ROOT}/src/pretzel/PretzelGlobal.cpp" PROPERTIES COMPILE_FLAGS "-x objective-c++")

  # Translate <includePath> tag.
  target_include_directories(PretzelGui PUBLIC
    "${PretzelGui_PROJECT_ROOT}/src"
  )

  # Translate <headerPattern> tag.
  target_include_directories(PretzelGui PRIVATE
    "${PretzelGui_PROJECT_ROOT}/include/pretzel"
    "${PretzelGui_PROJECT_ROOT}/include/modules"
    "${PretzelGui_PROJECT_ROOT}/include/components"
  )

  # Translate the <resource> tag.
  get_filename_component(RESOURCES_DEST_DIR "${CMAKE_RUNTIME_OUTPUT_DIRECTORY}" ABSOLUTE)
  file(COPY "${PretzelGui_PROJECT_ROOT}/resources" DESTINATION "${RESOURCES_DEST_DIR}")

  target_include_directories(PretzelGui SYSTEM BEFORE PUBLIC "${CINDER_PATH}/include")

  if(NOT TARGET cinder)
    include("${CINDER_PATH}/proj/cmake/configure.cmake")
    find_package(cinder REQUIRED PATHS
        "${CINDER_PATH}/${CINDER_LIB_DIRECTORY}"
        "$ENV{CINDER_PATH}/${CINDER_LIB_DIRECTORY}")
  endif()
  target_link_libraries(PretzelGui PRIVATE cinder)
endif()
But wait, you need to do one more thing for the resources.
If you are on MacOS, make a file ${CINDER_PATH}/blocks/PretzelGui/src/Resource.h with the contents:
#ifndef PREZTELGUI_RESOURCES_H_
#define PREZTELGUI_RESOURCES_H_

#include "cinder/CinderResources.h"

#define PRETZEL_GUI_SKIN CINDER_RESOURCE(../resources/, default_skin.png, 128, IMAGE)
#define PRETZEL_HSL_BAR CINDER_RESOURCE(../resources/, hslBar.png, 129, IMAGE)

#endif // PREZTELGUI_RESOURCES_H_
**This will not be sufficient for Windows users because loadResource operates differently
on Windows. If you want to use a GUI library on Windows, please look into simongeilfus/Cinder-ImGui as it is painless to set up (already has proj/cmake stuff).
Notice that the filepath ${CINDER_PATH}/blocks/PretzelGui/src/Resource.h
is dependent on where your public include directory is.
In this example, it was ${PretzelGui_PROJECT_ROOT}/src.
Now, in whichever CMake file you use this CinderBlock, you need to add the resources
to ci_make_xxx. For example, in apps/CMakeLists.txt, after the first two lines
of the file, I would add:
file(GLOB RESOURCE_LIST CONFIGURE_DEPENDS
  "${CINDER_PATH}/blocks/PretzelGui/resources/**"
)
and then I would add to the RESOURCES argument of ci_make_app:
ci_make_app(
    APP_NAME    cinder-myapp
    CINDER_PATH ${CINDER_PATH}
    SOURCES     ${SOURCE_LIST}
    LIBRARIES   mylibrary
    BLOCKS      PretzelGui
    RESOURCES   ${RESOURCE_LIST}
)
You can read more about resources in Cinder here: https://libcinder.org/docs/guides/resources/index.html.
Hurleyworks/NanoguiBlock
Here is the `cinderblock.xml`:<?xml version="1.0" encoding="UTF-8" ?> <cinder> <block name="ciNanogui" id="com.hurleyworks.nanoguiblock" author="Steve Hurley" license="BSD-style license" summary="Port of Wenzel Jakob's NanogGUI widget library" url="https://github.com/Hurleyworks/NanoguiBlock" git="git://github.com/Hurleyworks/NanoguiBlock.git" > <supports os="macosx" /> <supports os="msw" /> <copyExclude>sample</copyExclude> <header>ciNanoGui.h</header> <source>ciNanoGui.cpp</source> </block> </cinder>
Here is the ${CINDER_PATH}/blocks/NanoguiBlock/proj/cmake/NanoguiBlockConfig.cmake file:
if(NOT TARGET NanoguiBlock)
  get_filename_component(NanoguiBlock_PROJECT_ROOT "${CMAKE_CURRENT_LIST_DIR}/../.." ABSOLUTE)
  get_filename_component(CINDER_PATH "${NanoguiBlock_PROJECT_ROOT}/../.." ABSOLUTE)

  file(GLOB SOURCE_LIST CONFIGURE_DEPENDS
      "${NanoguiBlock_PROJECT_ROOT}/ciNanoGui.cpp"
  )

  file(GLOB INCLUDE_LIST CONFIGURE_DEPENDS
      "${NanoguiBlock_PROJECT_ROOT}/**/*.h"
      "${NanoguiBlock_PROJECT_ROOT}/**/*.hpp"
      "${NanoguiBlock_PROJECT_ROOT}/*.h"
      "${NanoguiBlock_PROJECT_ROOT}/*.hpp"
  )

  add_library(NanoguiBlock ${SOURCE_LIST})

  target_include_directories(NanoguiBlock PUBLIC ${NanoguiBlock_PROJECT_ROOT})
  target_include_directories(NanoguiBlock SYSTEM BEFORE PUBLIC "${CINDER_PATH}/include")

  if(NOT TARGET cinder)
      include("${CINDER_PATH}/proj/cmake/configure.cmake")
      find_package(cinder REQUIRED PATHS
              "${CINDER_PATH}/${CINDER_LIB_DIRECTORY}"
              "$ENV{CINDER_PATH}/${CINDER_LIB_DIRECTORY}")
  endif()

  target_link_libraries(NanoguiBlock PRIVATE cinder)
endif()
It looked as if the cinderblock.xml was missing some specifications of some include paths.
cinder/Cinder-OpenCV3
Here is the cinderblock.xml file:
<?xml version="1.0" encoding="UTF-8" ?>
<cinder>
<block
  name="OpenCV3"
  id="org.libcinder.opencv"
  author="Cinder Project"
  license="BSD"
  summary="OpenCV (v3) computer vision libraries"
  git="git://github.com/cinder/Cinder-OpenCV.git"
  version="3.0.0"
  libraryUrl="http://opencv.org/"
  >
  <header>include/CinderOpenCV.h</header>
  <includePath>include</includePath>
  <platform compiler="vc2015">
  	<platform config="Debug">
  		<staticLibrary>lib/vc2015/$(PlatformTarget)/opencv_calib3d300d.lib</staticLibrary>
  		<staticLibrary>lib/vc2015/$(PlatformTarget)/opencv_core300d.lib</staticLibrary>
  		<staticLibrary>lib/vc2015/$(PlatformTarget)/opencv_features2d300d.lib</staticLibrary>
  		<staticLibrary>lib/vc2015/$(PlatformTarget)/opencv_flann300d.lib</staticLibrary>
  		<staticLibrary>lib/vc2015/$(PlatformTarget)/opencv_hal300d.lib</staticLibrary>
  		<staticLibrary>lib/vc2015/$(PlatformTarget)/opencv_imgproc300d.lib</staticLibrary>
  		<staticLibrary>lib/vc2015/$(PlatformTarget)/opencv_ml300d.lib</staticLibrary>
  		<staticLibrary>lib/vc2015/$(PlatformTarget)/opencv_objdetect300d.lib</staticLibrary>
  		<staticLibrary>lib/vc2015/$(PlatformTarget)/opencv_photo300d.lib</staticLibrary>
  		<staticLibrary>lib/vc2015/$(PlatformTarget)/opencv_shape300d.lib</staticLibrary>
  		<staticLibrary>lib/vc2015/$(PlatformTarget)/opencv_stitching300d.lib</staticLibrary>
  		<staticLibrary>lib/vc2015/$(PlatformTarget)/opencv_superres300d.lib</staticLibrary>
  		<staticLibrary>lib/vc2015/$(PlatformTarget)/opencv_ts300d.lib</staticLibrary>
  		<staticLibrary>lib/vc2015/$(PlatformTarget)/opencv_video300d.lib</staticLibrary>
  		<staticLibrary>lib/vc2015/$(PlatformTarget)/opencv_videostab300d.lib</staticLibrary>
  		<staticLibrary>lib/vc2015/$(PlatformTarget)/ippicvmt.lib</staticLibrary>
  	</platform>
  	<platform config="release">
  		<staticLibrary>lib/vc2015/$(PlatformTarget)/opencv_calib3d300.lib</staticLibrary>
  		<staticLibrary>lib/vc2015/$(PlatformTarget)/opencv_core300.lib</staticLibrary>
  		<staticLibrary>lib/vc2015/$(PlatformTarget)/opencv_features2d300.lib</staticLibrary>
  		<staticLibrary>lib/vc2015/$(PlatformTarget)/opencv_flann300.lib</staticLibrary>
  		<staticLibrary>lib/vc2015/$(PlatformTarget)/opencv_hal300.lib</staticLibrary>
  		<staticLibrary>lib/vc2015/$(PlatformTarget)/opencv_imgproc300.lib</staticLibrary>
  		<staticLibrary>lib/vc2015/$(PlatformTarget)/opencv_ml300.lib</staticLibrary>
  		<staticLibrary>lib/vc2015/$(PlatformTarget)/opencv_objdetect300.lib</staticLibrary>
  		<staticLibrary>lib/vc2015/$(PlatformTarget)/opencv_photo300.lib</staticLibrary>
  		<staticLibrary>lib/vc2015/$(PlatformTarget)/opencv_shape300.lib</staticLibrary>
  		<staticLibrary>lib/vc2015/$(PlatformTarget)/opencv_stitching300.lib</staticLibrary>
  		<staticLibrary>lib/vc2015/$(PlatformTarget)/opencv_superres300.lib</staticLibrary>
  		<staticLibrary>lib/vc2015/$(PlatformTarget)/opencv_ts300.lib</staticLibrary>
  		<staticLibrary>lib/vc2015/$(PlatformTarget)/opencv_video300.lib</staticLibrary>
  		<staticLibrary>lib/vc2015/$(PlatformTarget)/opencv_videostab300.lib</staticLibrary>
  		<staticLibrary>lib/vc2015/$(PlatformTarget)/ippicvmt.lib</staticLibrary>
  	</platform>
  </platform>
  <platform os="macosx">
  		<staticLibrary>lib/macosx/libopencv_calib3d.a</staticLibrary>
  		<staticLibrary>lib/macosx/libopencv_core.a</staticLibrary>
  		<staticLibrary>lib/macosx/libopencv_features2d.a</staticLibrary>
  		<staticLibrary>lib/macosx/libopencv_flann.a</staticLibrary>
  		<staticLibrary>lib/macosx/libopencv_hal.a</staticLibrary>
  		<staticLibrary>lib/macosx/libopencv_imgproc.a</staticLibrary>
  		<staticLibrary>lib/macosx/libopencv_ml.a</staticLibrary>
  		<staticLibrary>lib/macosx/libopencv_objdetect.a</staticLibrary>
  		<staticLibrary>lib/macosx/libopencv_photo.a</staticLibrary>
  		<staticLibrary>lib/macosx/libopencv_shape.a</staticLibrary>
  		<staticLibrary>lib/macosx/libopencv_stitching.a</staticLibrary>
  		<staticLibrary>lib/macosx/libopencv_superres.a</staticLibrary>
  		<staticLibrary>lib/macosx/libopencv_video.a</staticLibrary>
  		<staticLibrary>lib/macosx/libopencv_ts.a</staticLibrary>
  		<staticLibrary>lib/macosx/libopencv_videoio.a</staticLibrary>
  		<staticLibrary>lib/macosx/libopencv_videostab.a</staticLibrary>
  		<staticLibrary>lib/macosx/libippicv.a</staticLibrary>
  		<staticLibrary absolute="true">-lz</staticLibrary>
  		<framework sdk="true">OpenCL.framework</framework>
  </platform>
  <platform os="ios" sdk="simulator">
  		<staticLibrary>lib/ios-sim/libopencv.a</staticLibrary>
  </platform>
  <platform os="ios" sdk="device">
  		<staticLibrary>lib/ios/libopencv.a</staticLibrary>
  </platform>
</block>
<template>templates/Basic OpenCV/template.xml</template>
</cinder>
Here is the corresponding ${CINDER_PATH}/blocks/Cinder-OpenCV3/proj/cmake/Cinder-OpenCV3Config.cmake file:
if(NOT TARGET Cinder-OpenCV3)
# Define ${Cinder-OpenCV3_PROJECT_ROOT}. ${CMAKE_CURRENT_LIST_DIR} is just the current directory.
get_filename_component(Cinder-OpenCV3_PROJECT_ROOT "${CMAKE_CURRENT_LIST_DIR}/../.." ABSOLUTE)

# Define ${CINDER_PATH} as usual.
get_filename_component(CINDER_PATH "${Cinder-OpenCV3_PROJECT_ROOT}/../.." ABSOLUTE)

# Translate the <staticLibrary> tag.
# cv-core
add_library(cv-core STATIC IMPORTED)
set_property(TARGET cv-core PROPERTY IMPORTED_LOCATION "${Cinder-OpenCV3_PROJECT_ROOT}/lib/macosx/libopencv_core.a")

# cv-video
add_library(cv-video STATIC IMPORTED)
set_property(TARGET cv-video PROPERTY IMPORTED_LOCATION "${Cinder-OpenCV3_PROJECT_ROOT}/lib/macosx/libopencv_video.a")

# ... keep going ...


# There are no source files for this project. We have to create a "dummy" source.
file(WRITE dummy.cc "")
# Create the library from the source files. The target is now defined.
add_library(Cinder-OpenCV3 dummy.cc)

# Link the prebuilt libraries.
target_link_libraries(Cinder-OpenCV3 cv-core cv-video)

# Translate <includePath> tag.
target_include_directories(Cinder-OpenCV3 INTERFACE
  "${Cinder-OpenCV3_PROJECT_ROOT}/include"
  "${Cinder-OpenCV3_PROJECT_ROOT}/include/opencv2"
)

target_include_directories(Cinder-OpenCV3 SYSTEM BEFORE INTERFACE "${CINDER_PATH}/include" )
endif()